The Final Reveal – ORC Week 6

It is completely amazing what can be accomplished when you create a schedule, and stick to it! I am the type of person who prefers to wing it. I wing everything, from daily chores to food shopping, deciding what to post on Instagram to blogging. It’s just my personality. However, throughout this entire One Room Challenge, I made and stuck to a schedule. Let me tell you, there was not a single moment where I felt stressed or felt that this challenge wouldn’t have been completed on time.

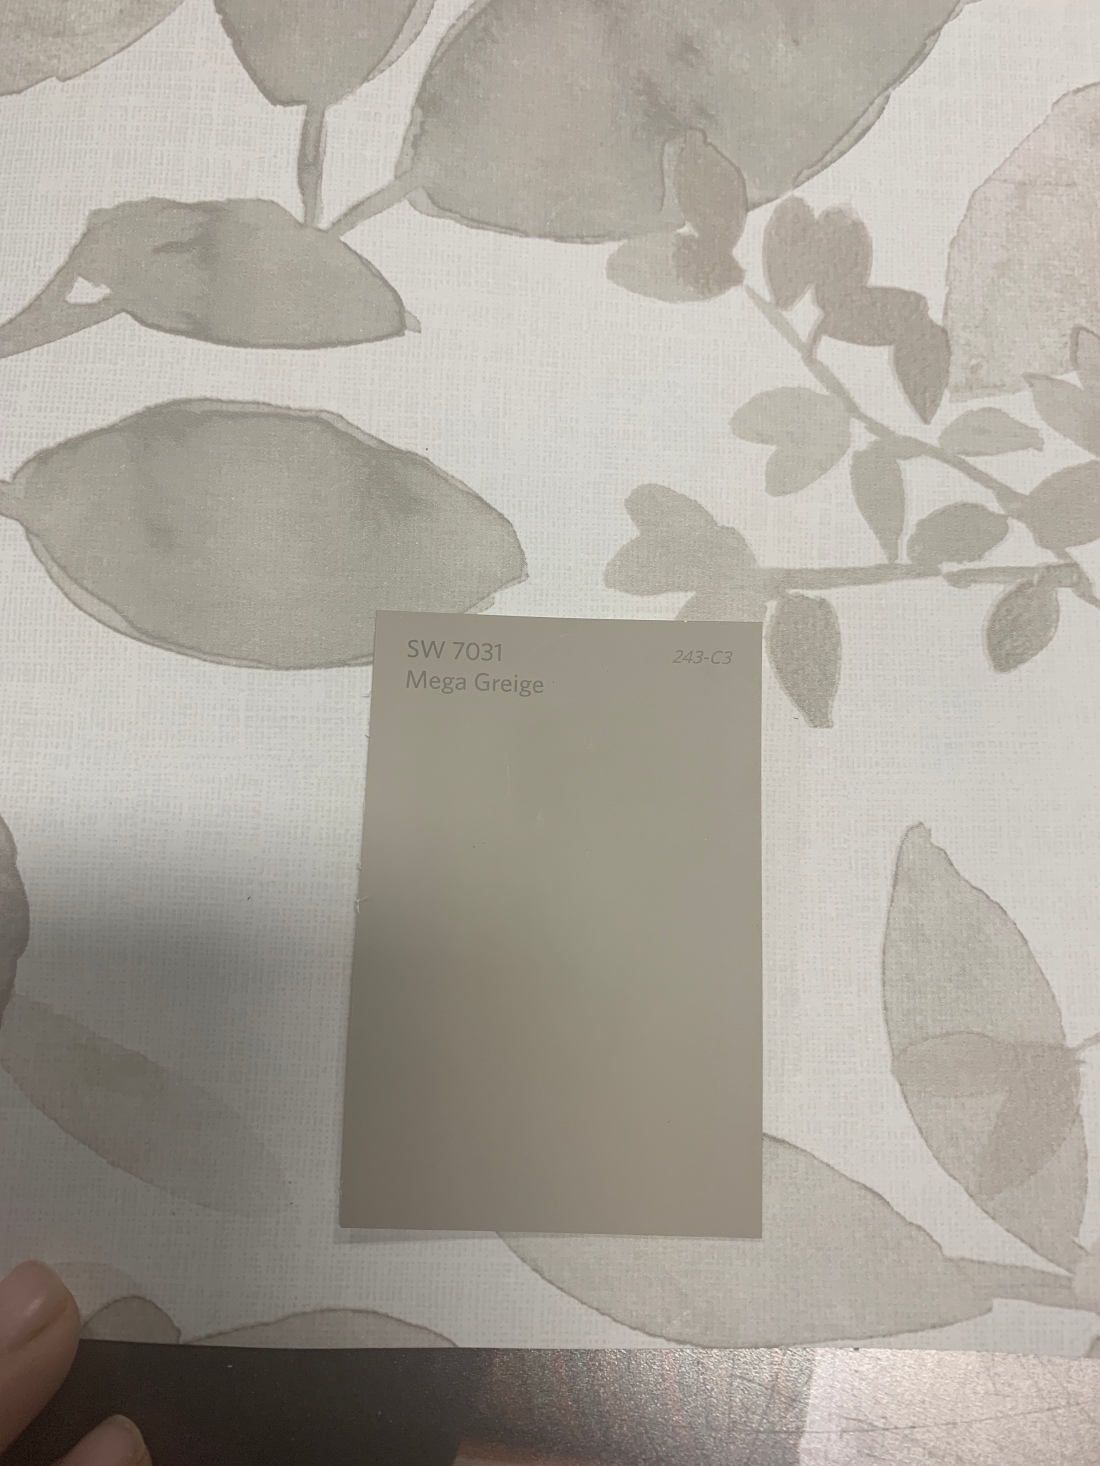
Here is what I learned from this challenge. Though, we only worked with a small space, I learned that picking and sticking to a budget is extremely important when attempting a room make over. Although, we didn’t go over budget, we definitely  had unexpected costs that would have wound up being a problem if we were working with such a tight budget. Wallpaper. Just because a description says X amount of rolls will cover X amount of square feet; always order more. If you cannot afford more than it would be wise to find a different print in a more affordable price range. Other than our little wallpaper debacle, I would say that this challenge ran incredibly smoothly.

All in all, my husband and I are extremely pleased with the final result of this project, between you and me, I am already designing out next space for the upcoming One Room Challenge in the fall (though my other half doesn’t know this yet HAHA). Well, I shall not keep you any longer, Alas, the final reveal….


IMG_4900

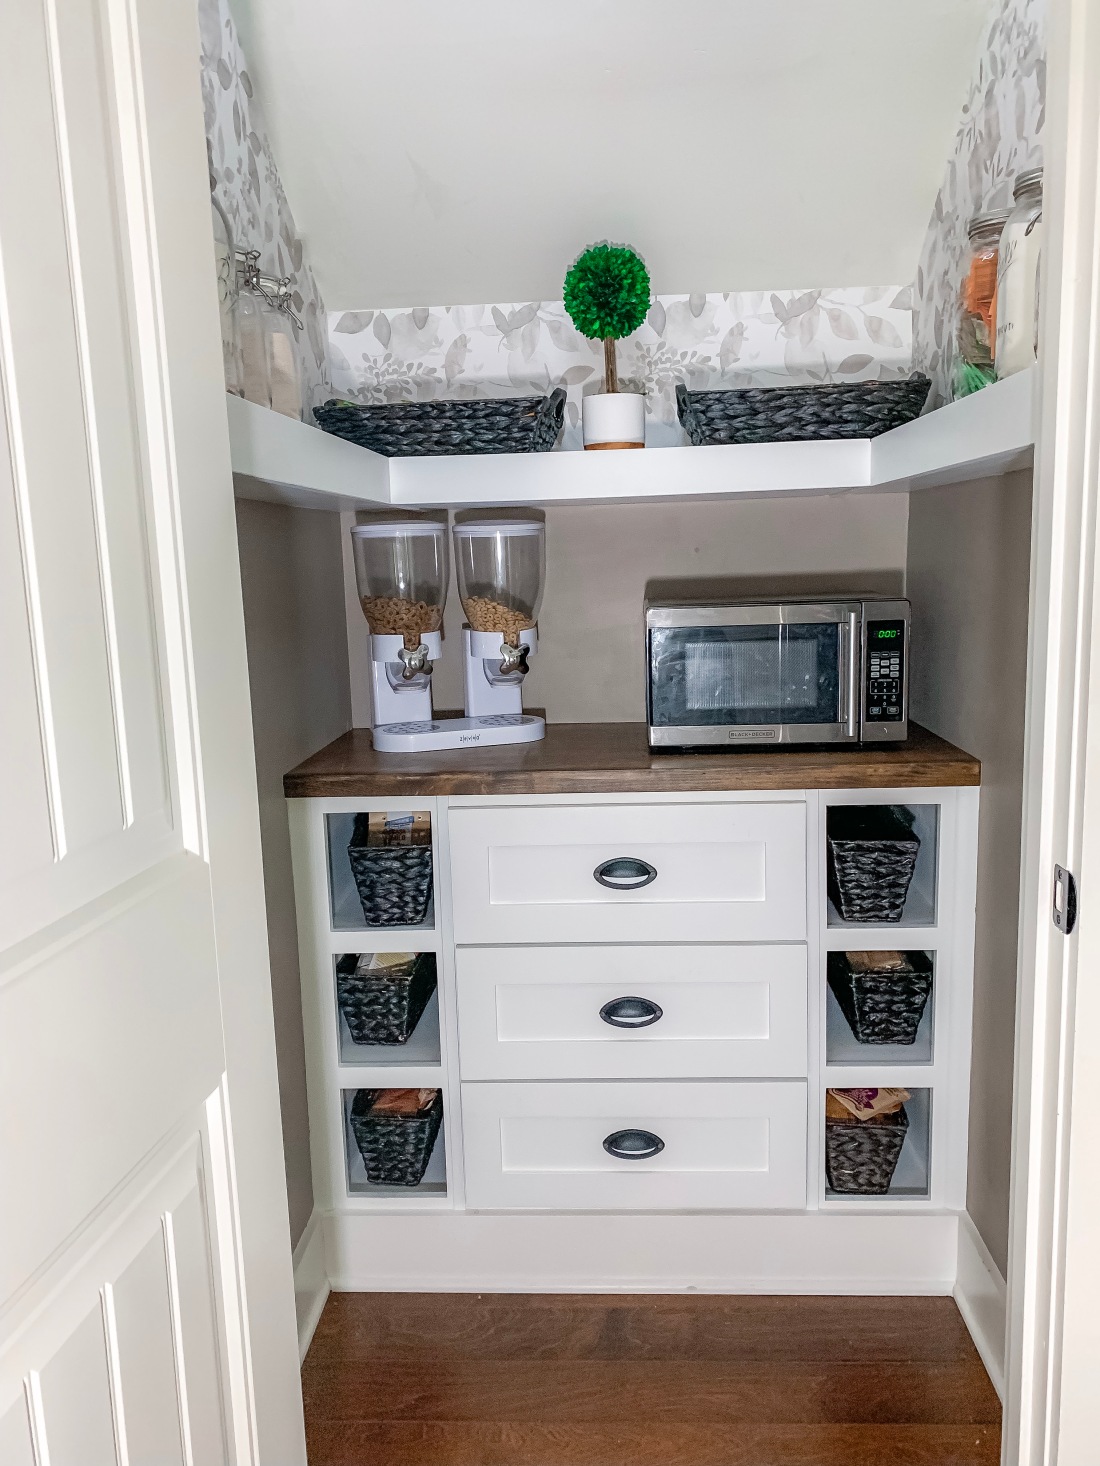
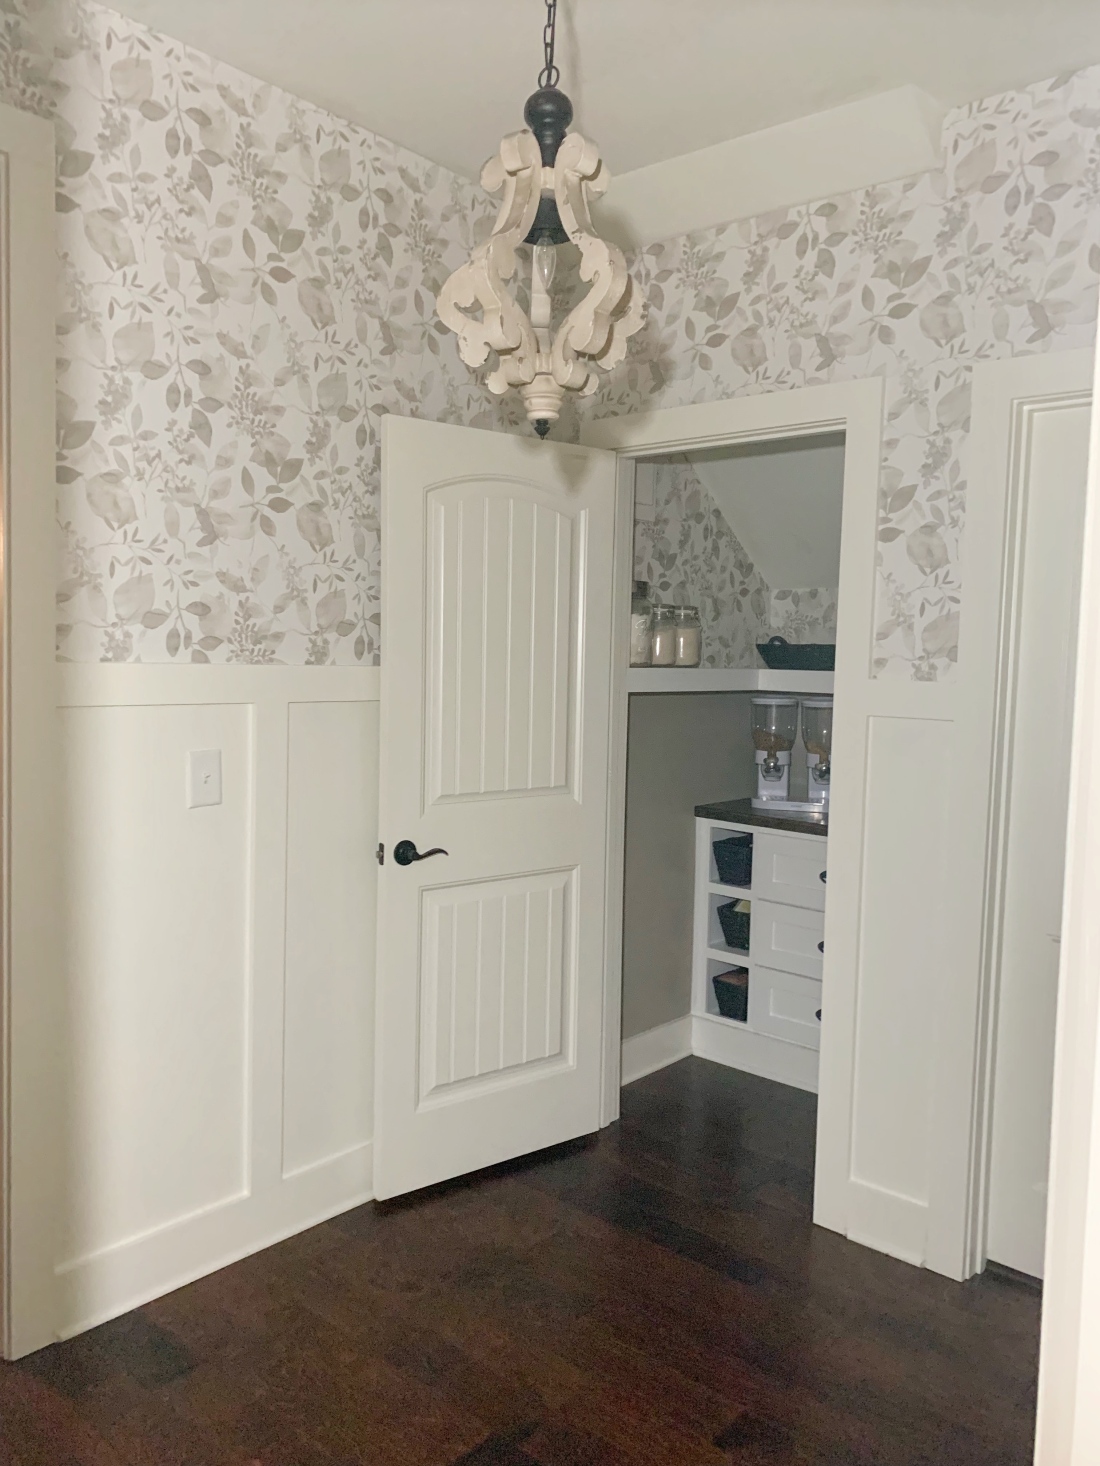
I am so happy with how board and batten, wallpaper and converting a tiny closet in an awkwardly spaced hallway can have such a dramatic effect. I am going to break down all of the details for you all now.

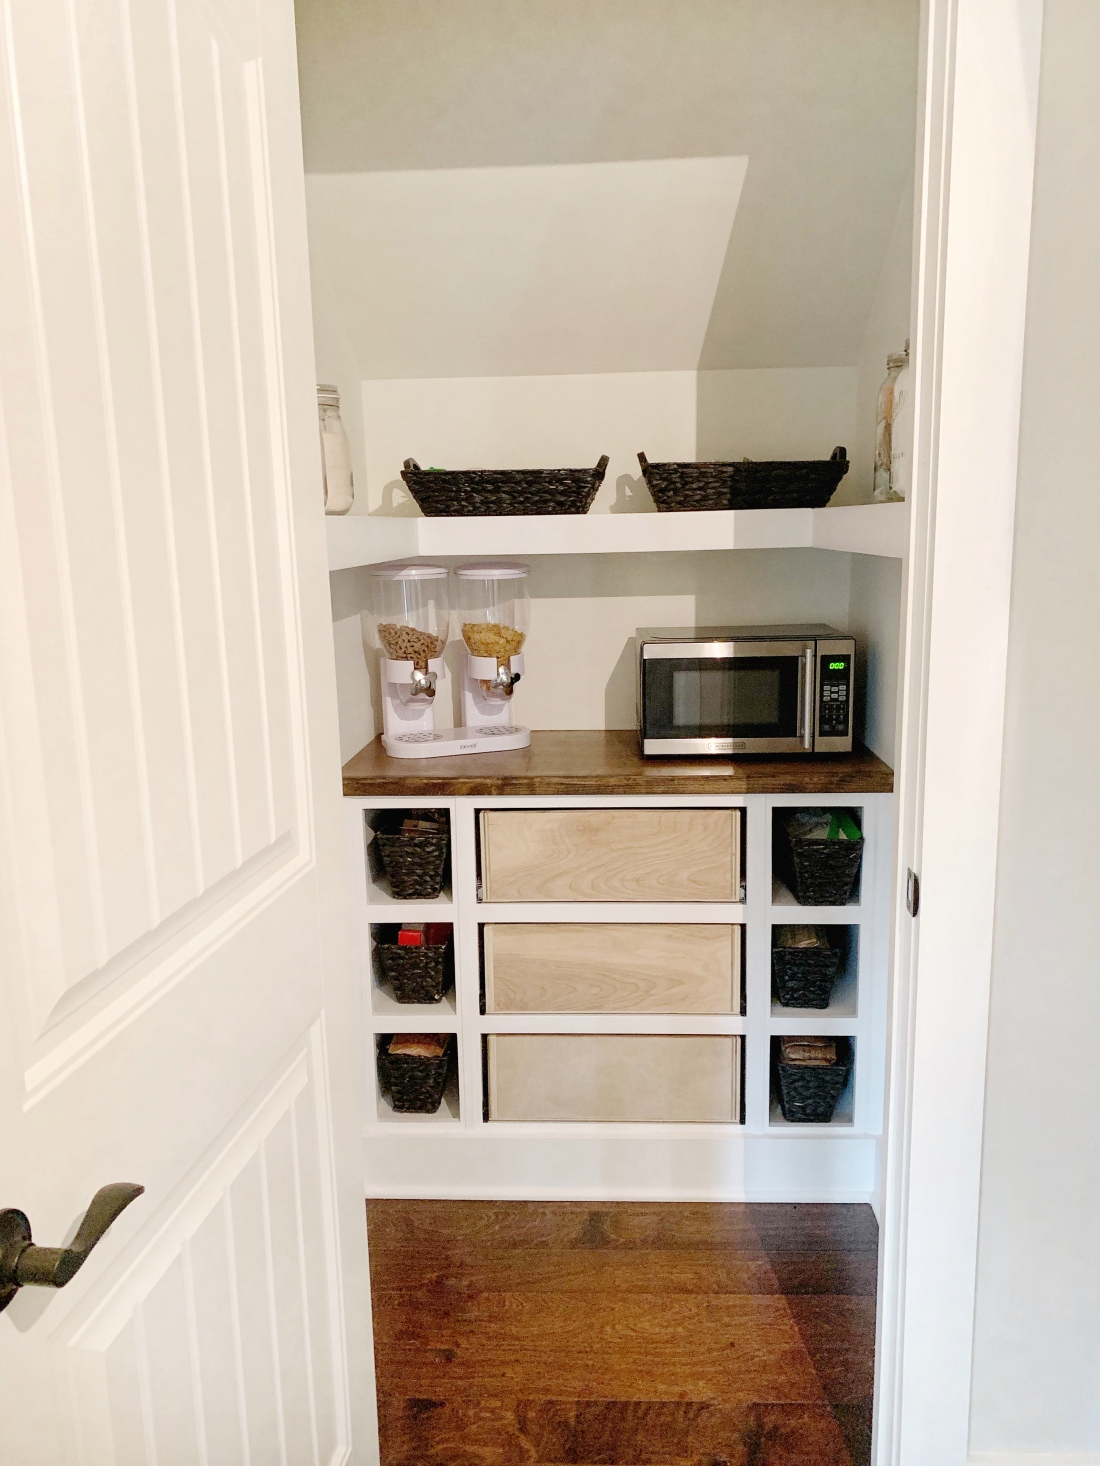
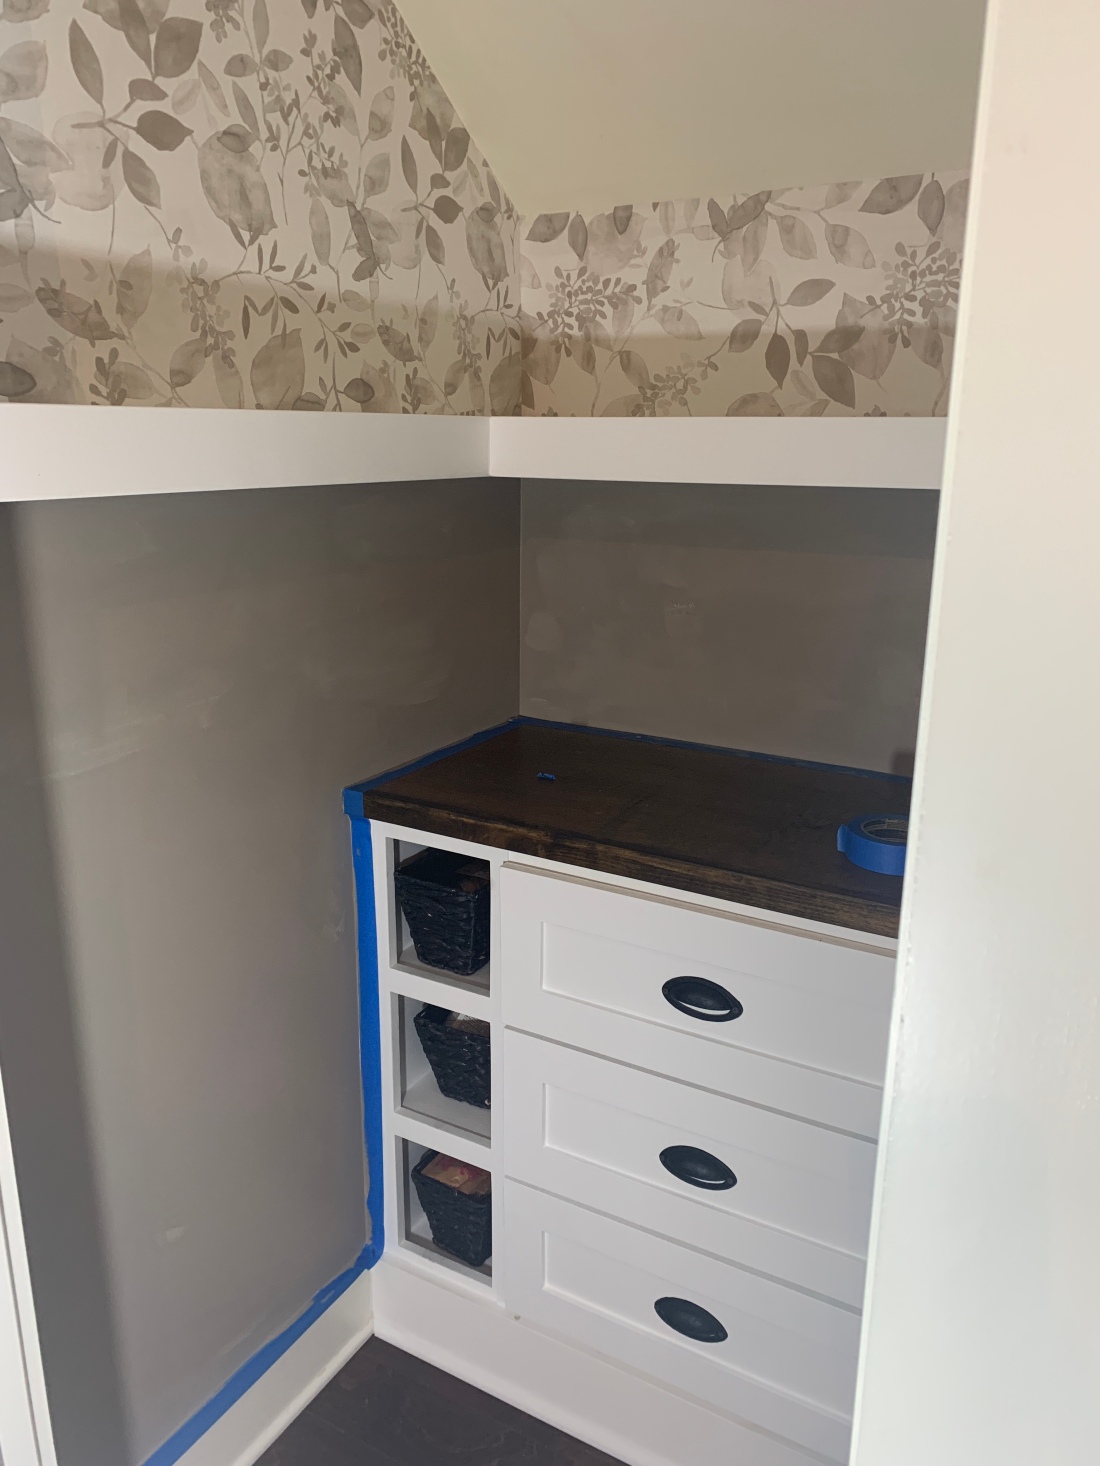
First and foremost, this project would not have had the impact it did had it not been for my custom cabinet guy, Jason. Jason put my vision to life. He was quick, efficient, and listened to everything I said I wanted. Even though he was working in such a tight space, he made it happen. Since he worked so quickly, I also asked him to throw up that board and batten for me as well. So many kudos to Jason.

IMG_4898.JPGIf you are local to the Atlanta region – Jason is available for any custom wood work plans you may have – you can contact him at Atlanta Cabinets & Furniture 404-610-5968


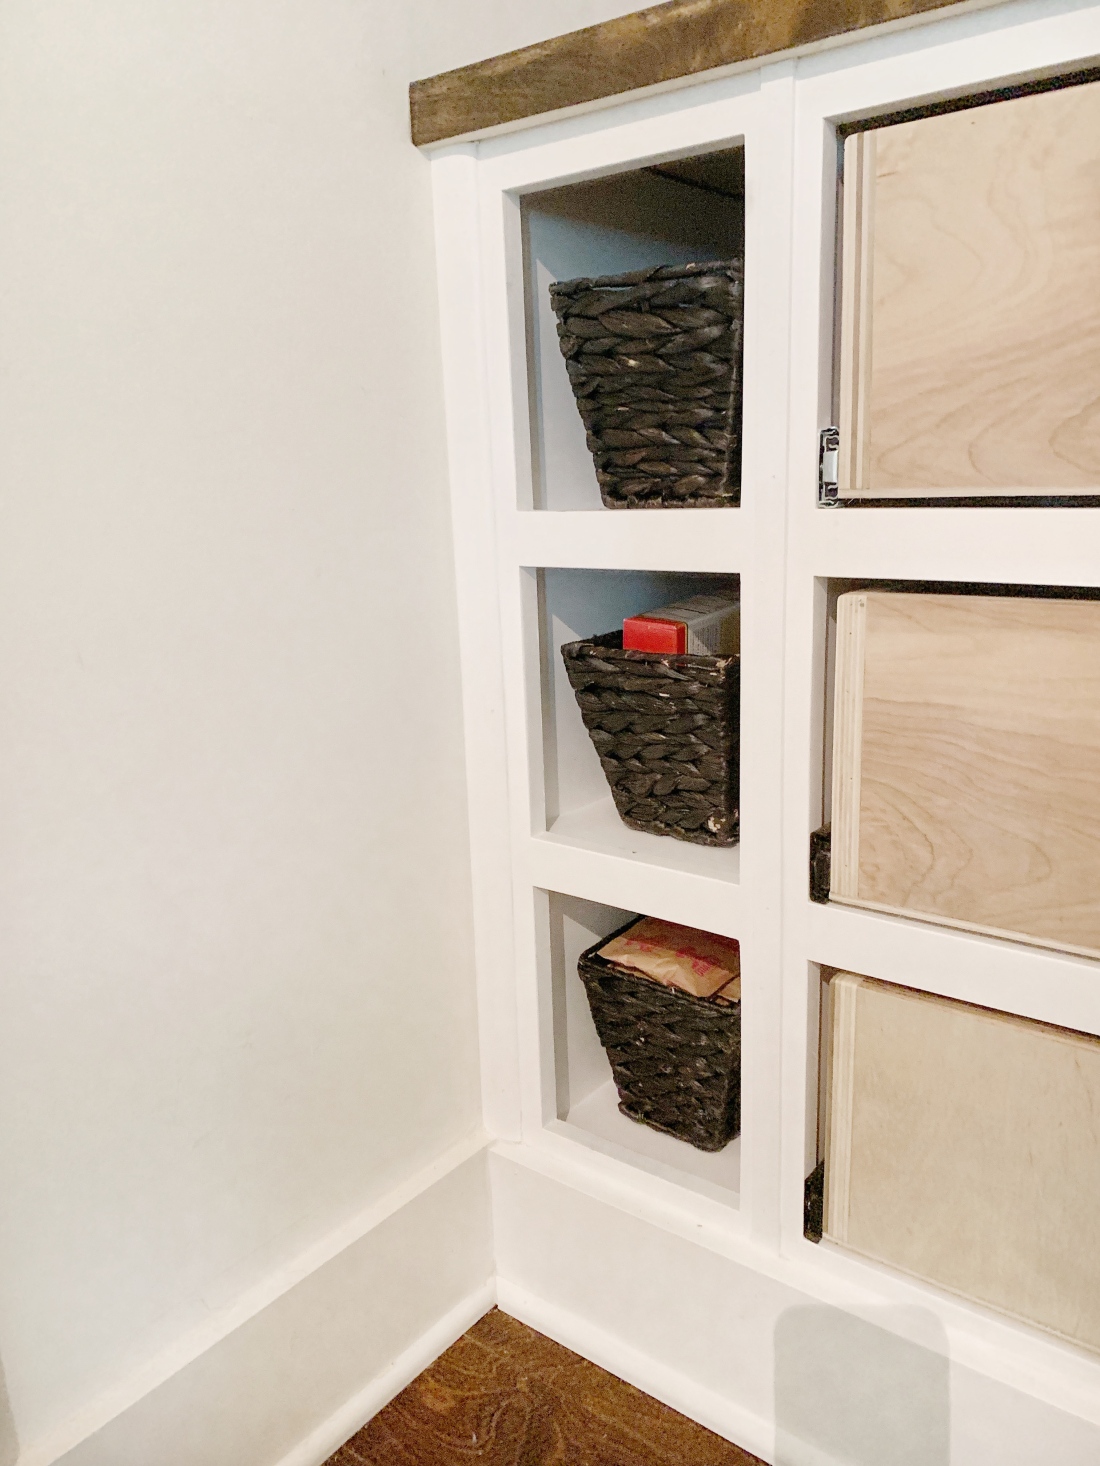
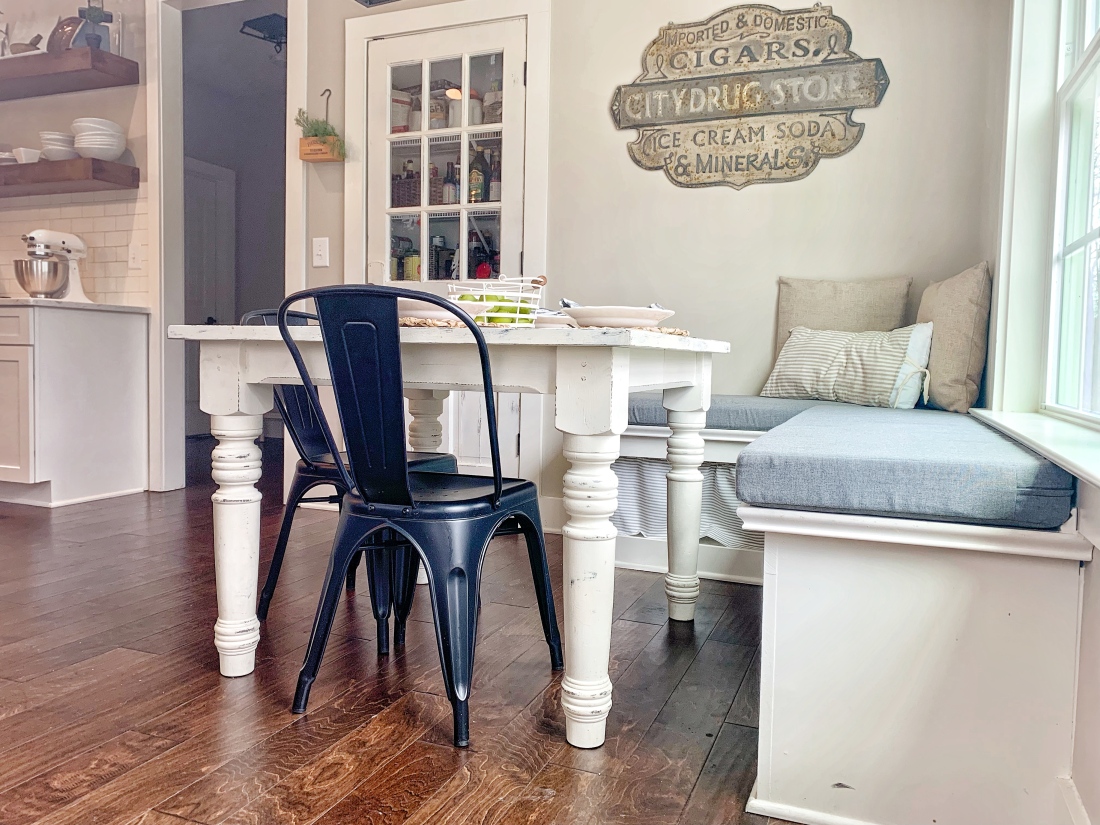
I filled these custom shelves and cubby holes with black wicker baskets from Big Lots. Each basket is functional and serve the purpose of storing our children’s snacks. (A huge pet peeve of mine is seeing snack boxes in pantries, baskets are the perfect way to conceal the ugly unhealthy wrappers from the sanctimommies 😉 ).

I initially purchased our console table from TJMaxx, but as life would have it, I wound up finding the perfect set of vintage theatre seats for my entryway last weekend at Vintage Pickin’ (an incredible vintage market in Alabama – if you haven’t been, it needs to go on your bucket list. Stay tuned for that blog coming up next). So, all of my furniture had to be rearranged to accommodate those incredible additions. That console table found a new home upstairs in my craft room, and was replaced by my first, ever purchased vintage piece of furniture. I bought this superb piece from my favorite antique market, Queen of Hearts when we moved to Georgia from Florida a little over 4 years ago. It is one of my favorite pieces I own, and what better place to display it than in the One Room Challenge reveal?

IMG_4896
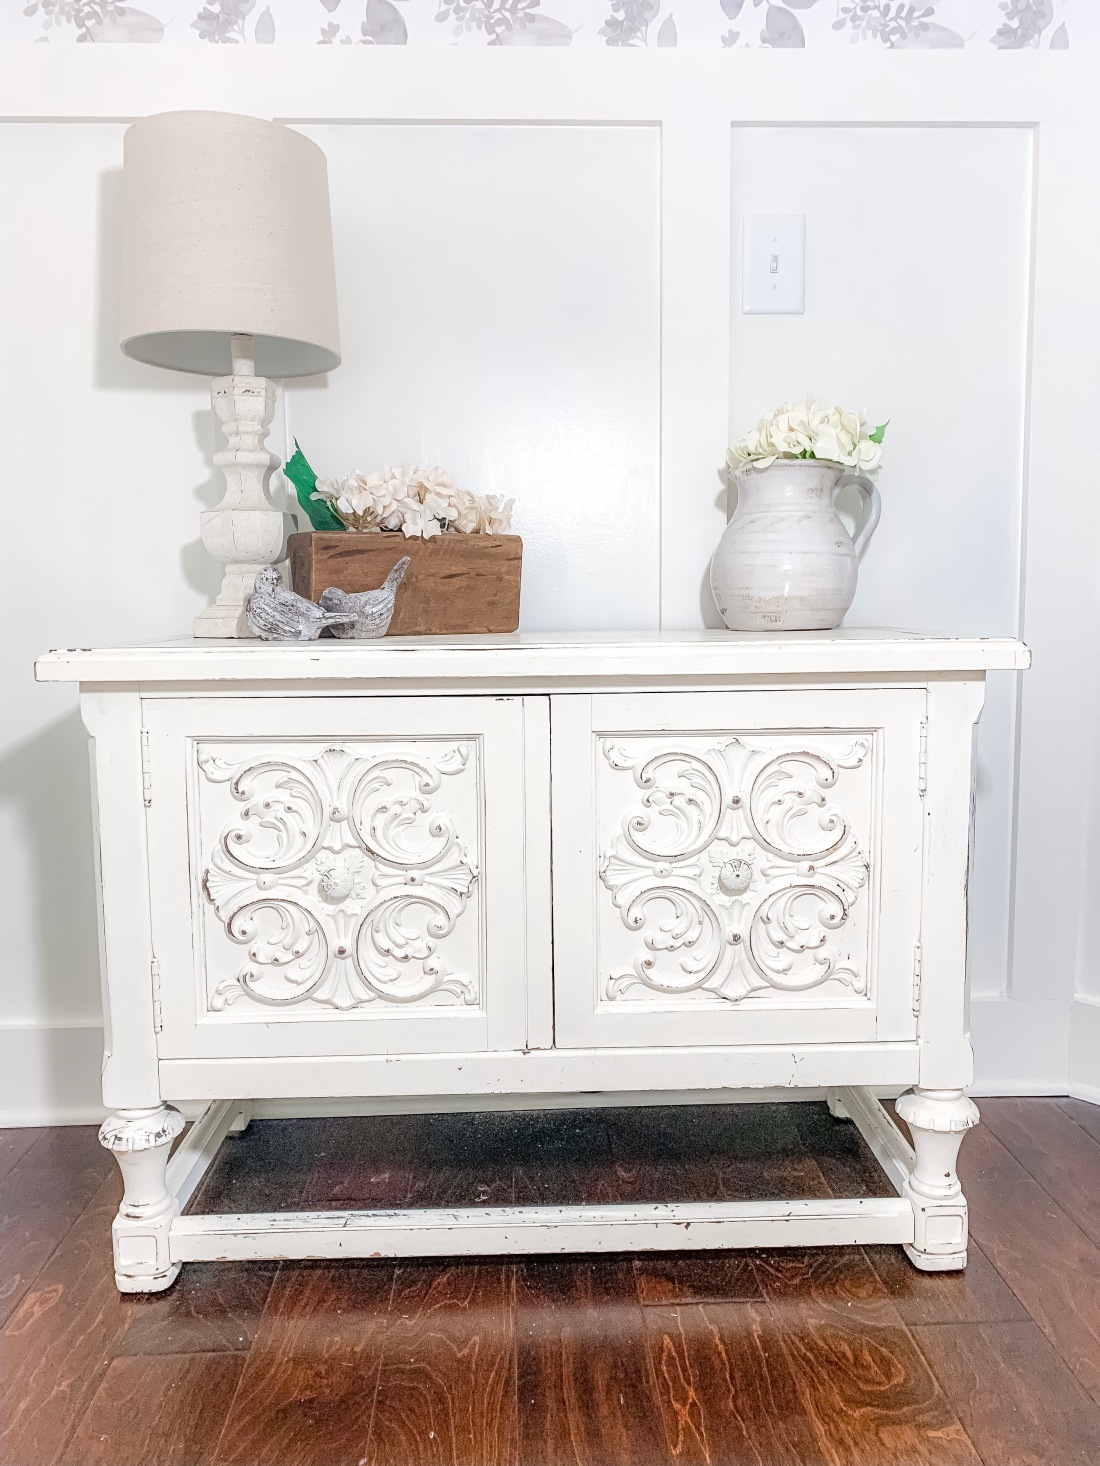
The wood work and details had me at hello.

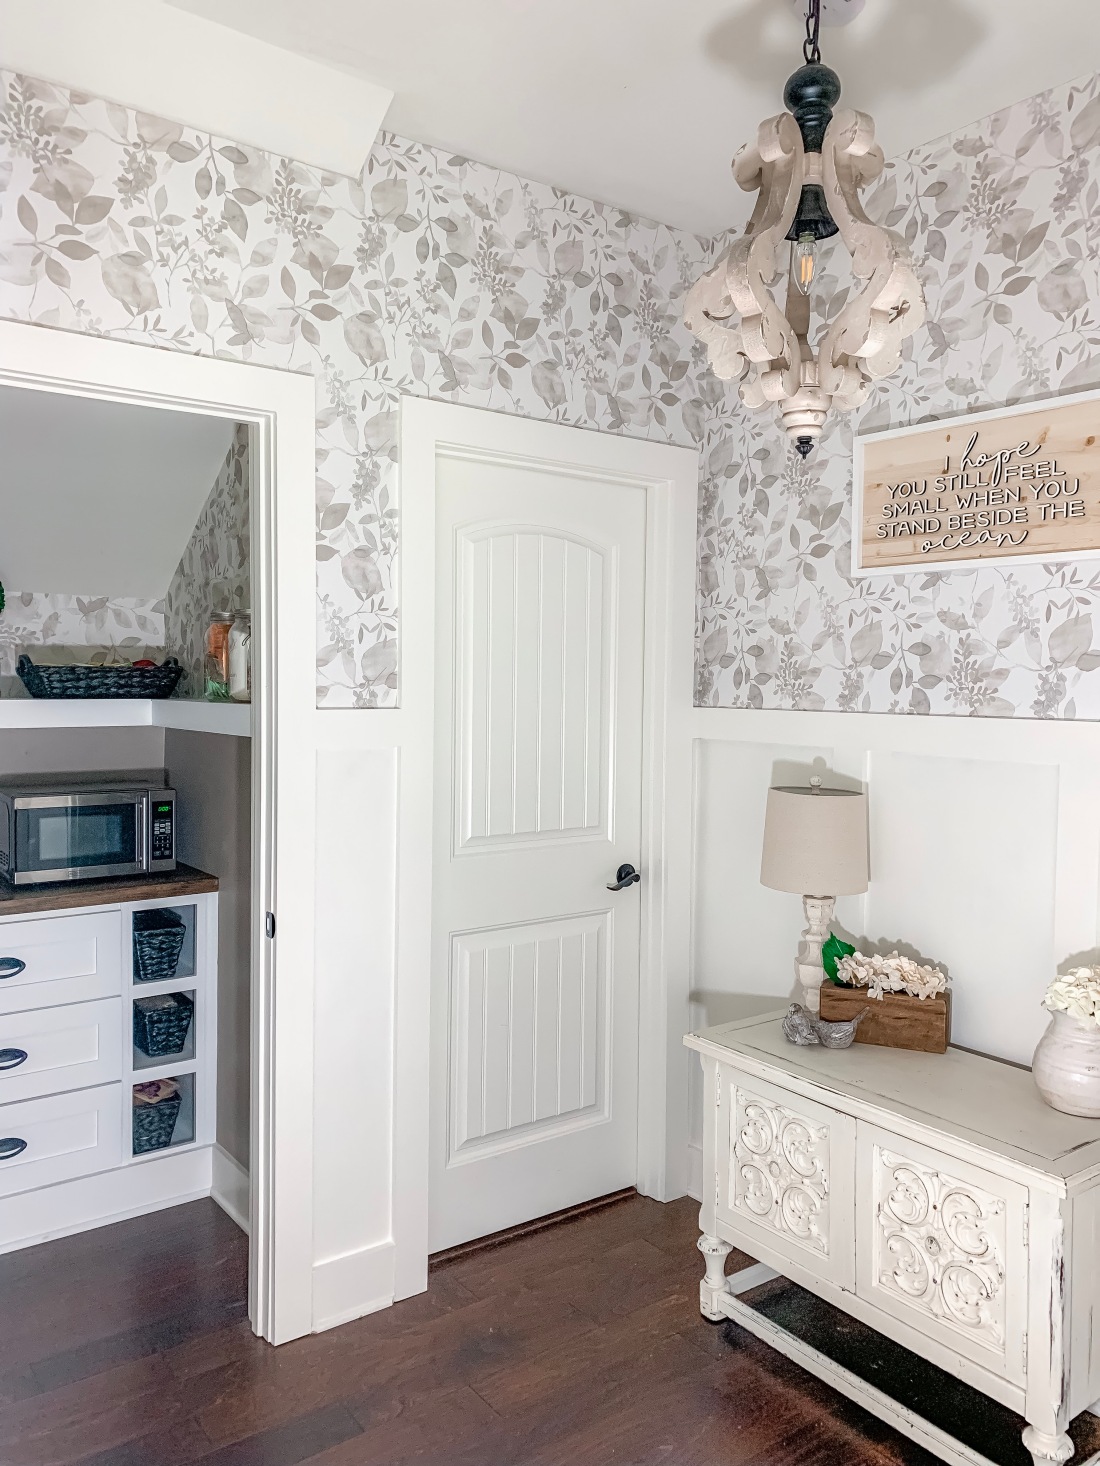
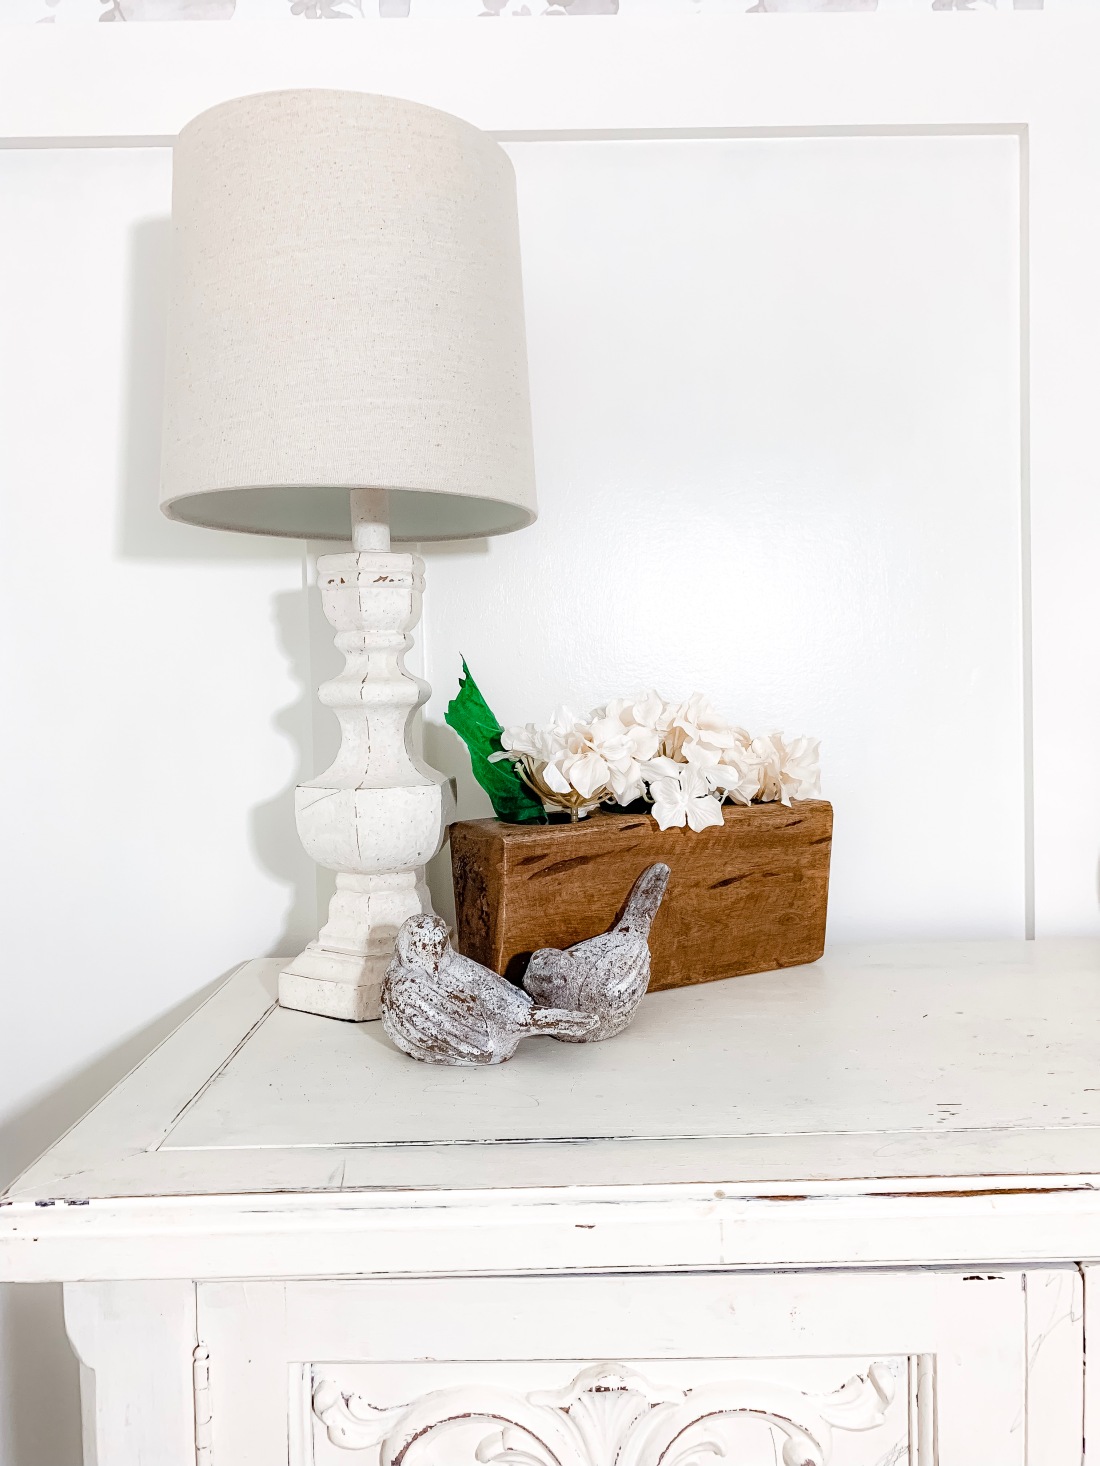
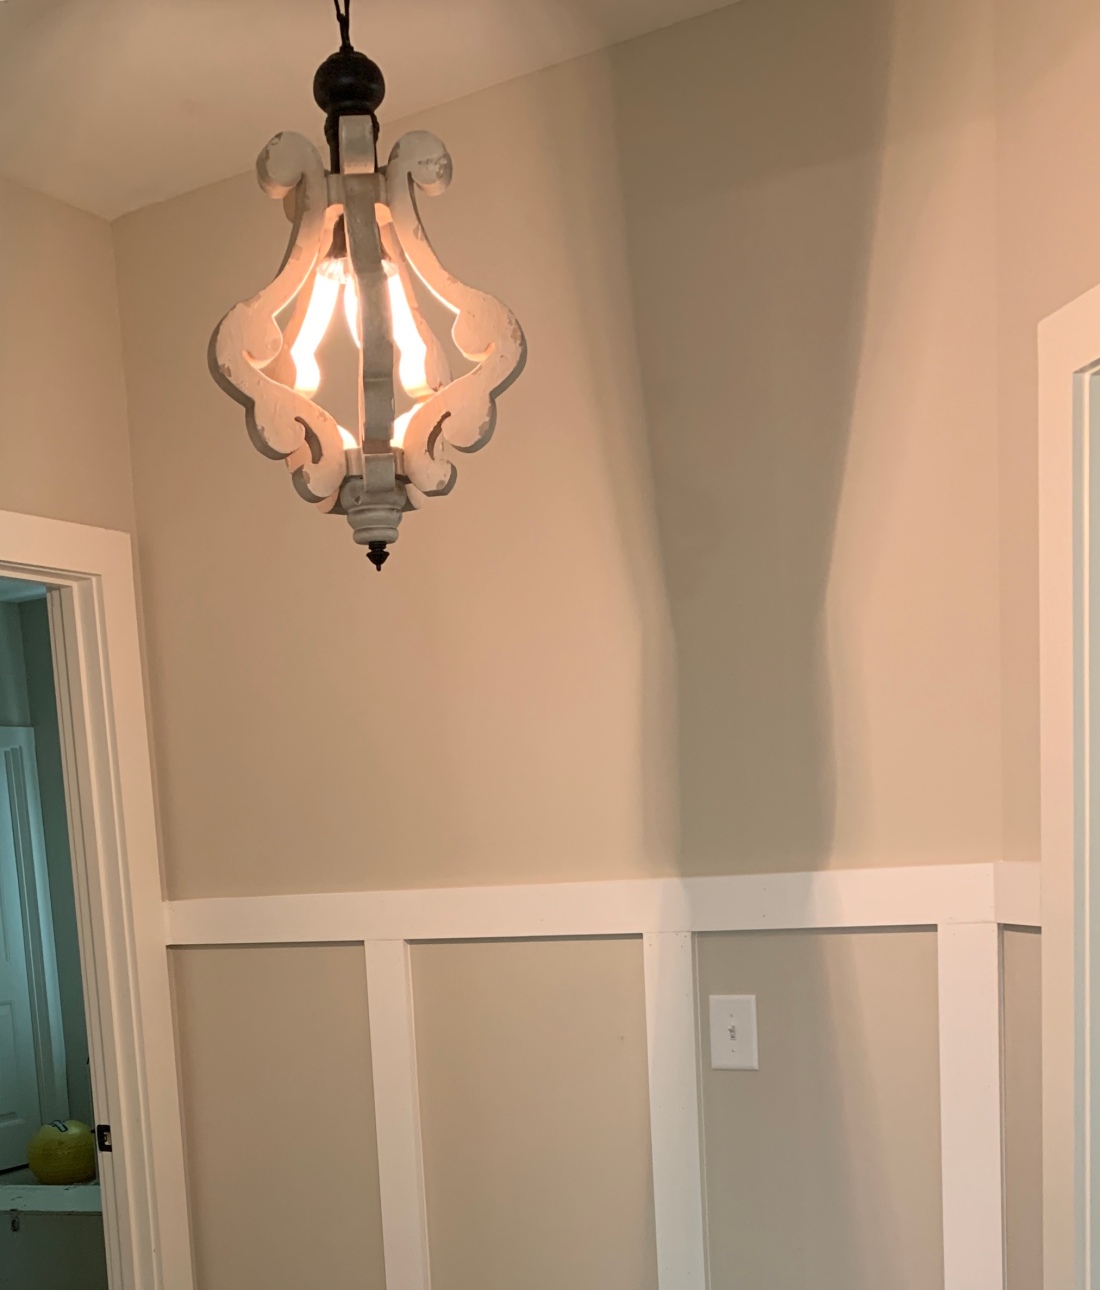
Let’s talk about the accents on the table. I scored the distressed lamp from Kirkland’s, which was on sale for 50% off. The grand total for that unbelievable find was $21. Um, yeah, SCORE. I tend to do a lot of window shopping at Homegoods, It’s one of those stores that I love to browse and walk up and down the aisles. Well, guess who’s carrying sugar molds now?? Yep. This sugar mold was crazy inexpensive. I snagged it so fast I thought the other customers around me thought I was a nut case. I decided to fill the mold with faux hydrangeas to make it flow with the wallpaper. Last, but certainly not least, my ceramic birds and distressed white clay pitcher. There’s this incredible online store called Parish Mercantile, (if you’ve been following me on Instagram since the beginning you’d know that it is my favorite online store) I purchased both from it. These birds have made their way all over my living room, entryway and now the kids’ hallway. I loved them so much, I decided that instead of relocating them every couple of months, I should just buy two more. There was zero regrets on that front.

IMG_4895

I was hesitant about hanging a picture over the wallpaper. It’s a completely different ballgame when you put in the labor for home makeovers. My first thought was ‘ughhh I don’t want to damage the walls, it took so much work to line this wallpaper up, what if I don’t like a sign up there and I ruin it?!’. After going back and forth in my head for a couple of weeks, I decided to just go with it. I designed this laser cut wood sign and contacted my friends over at WoodScape ( Instagram – @wood_scape._). They had made me a sign previously for my butler’s pantry and I knew their work was exquisite. The quality of their signs are beyond anything I have seen floating around on the ‘gram, plus the owners are some of the nicest human beings I have ever encountered. When coming up with the design, I wanted to choose something that reflected my feelings towards my children. It was incredibly important to me to have something original yet said that this was their hallway. Lee Anne Womack’s song, I Hope You Dance, always hits me right in the feels, I get teary eyed every time I hear it. “I hope you still feel small when you stand beside the ocean”. Is there any mother out there that does NOT get emotional when they hear those lyrics?! And as for the finish, I decided to stick with natural tones.

IMG_4894
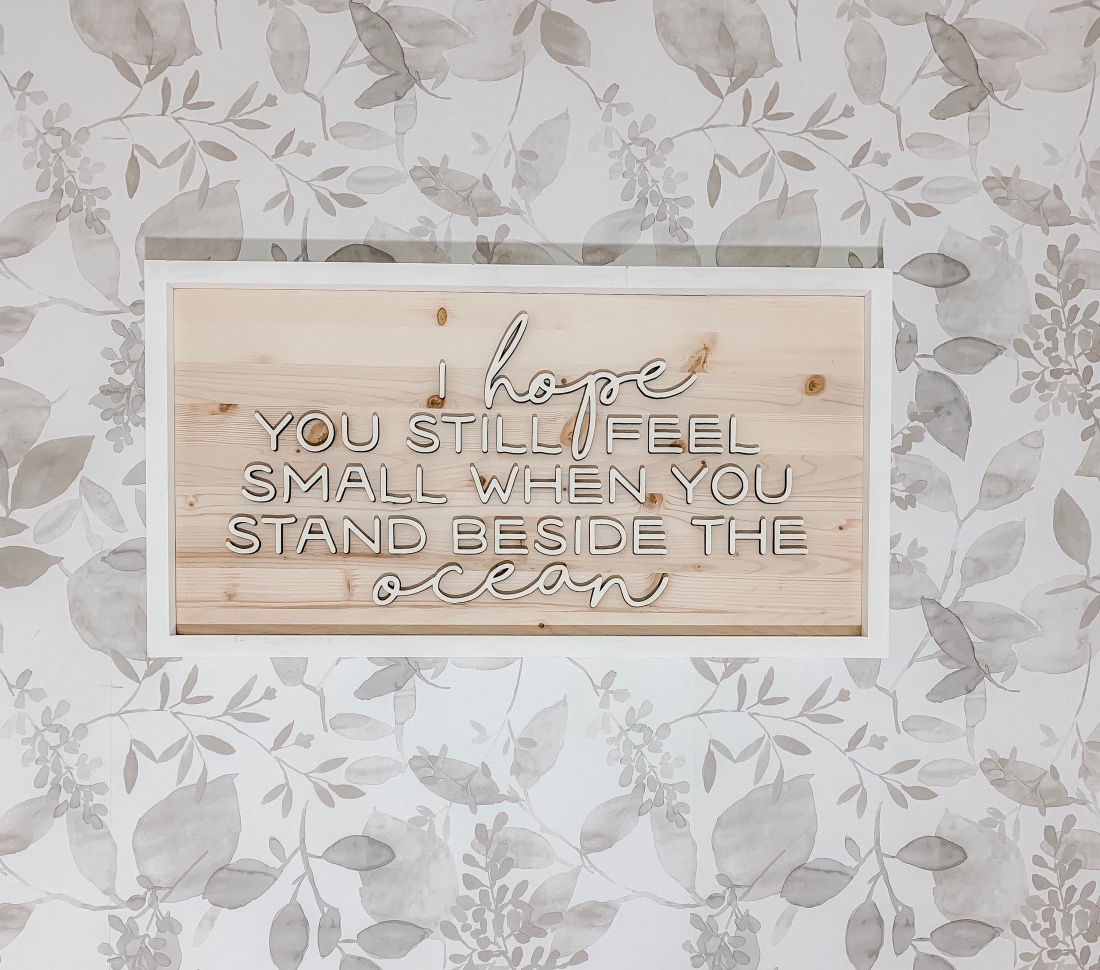
I’m not crying, you’re crying.

I felt that the natural tones really pulled the light fixture in with sign. The whites on the sign pulled in the table. The decor pulled in the taupes in the wallpaper and the dark walnut in the pantry just completed the entire project.

IMG_4897.JPG

And there you have it! Our first One Room Challenge, completed! No hiccups, no going over budget, and just an incredibly fun experience for both my husband and myself. I hope you all had just as fun of a time following along with me throughout this entire process! I cannot wait until the fall for our next challenge!


All contacts for  sources of companies listed below.

Atlanta Cabinets & Furniture – 404-610-5968

Woodscape – woodscapedesign.com

Parish Mercantile – http://www.parishmercantile.com

Kirkland’s – North Point – 678-339-0981

Homegoods – North Point – 770-642-1514


Wallpaper Makes the Heart Grow Fonder – ORC Week 5

What a week it has been! My husband and I have finished all of our tasks for the One Room Challenge, and let me tell you, we both could not be more thrilled, excited and proud of all of the hard work we put into this project. The best part of all, we didn’t get on each other’s nerves once! That in itself if a miracle and blessing on its own. HAHA. On a serious note though, we completed the wallpaper throughout the hallway and did a little paint job as a last minute added touch to the pantry. First, let’s talk about this amazing wallpaper for a minute.

I had posted in my stories a few wallpaper selections and initially wanted my followers to help me choose the best one for the space. I narrowed those choices down to one, but wasn’t “in love” with the paper. I knew that it was going to have to be something that I truly loved since wallpaper isn’t exactly the easiest thing to remove and replace. So, I decided to keep on looking to see if I could find something that really grabbed my attention, and heart. Well, a couple days and numerous hours later, while browsing on Amazon (this has become my number one product source throughout this project apparently), I found “the one”. A taupe and beige watercolor floral wallpaper. It was exactly what I was envisioning when I drew up the design plans for my children’s hallway makeover. After doing the math, well I should say after my husband did the math because we’ve already spoken about how I can’t do numbers, we came to the conclusion that our 52 square foot space would not need more that 1 roll of wallpaper. The roll was said to cover 54 square feet. Being that we were only wallpapering the top portions of the wall we assumed we were good to go. The wallpaper was pricey, $104 a roll, but since we only needed one roll I said we could definitely swing it. (I would have rather spent more and been truly happy than spent less and settle for something I was just going to want to change in the future). So the day has come when we started to install, which was approximately 2 weeks ago from the time we purchased the wallpaper. Guys. Neither one of us counted for the amount of paper we would wind up wasting due to matching the patterns with precision. Well, the one roll covered just one wall. I immediately went straight into panic mode. We were on a deadline! I decided to order two more rolls from Amazon as soon as I stopped panicking. I go to hit that infamous confirm purchase tab and then I see it… that dreaded notification that says “your order will be delivered by April 29th”. The only thing I could do at this point was be optimistic, cross my fingers and pray for the best.

Well, there must be some sort of guardian angel by my side throughout this project because the additional rolls were delivered the next day. It was a miracle. I was pretty certain that we would not complete this project by it’s deadline. My husband and I quickly got to work and wouldn’t you know it, we ran out of wallpaper adhesive. It was a sick joke. I’m not sure what the deal is with both the wallpaper company and adhesive company, but both were claiming each product would cover 54 square feet. LIES. I hauled butt to Home Depot, grabbed more glue, hustled home, and we completed the entire hallway and pantry by the end of the day on Saturday. It was such a relief I can’t even begin to describe. More so that we were able to complete this part of the project all throughout Giuliana’s nap time.

My super cute husband needs credit and acknowledgment when deserved. He rocked this project and did it for me.

So, wallpaper is up, we had just enough to cover the top portion of the mini pantry. I then text my best friend a photo saying, ” its missing something, it doesn’t look complete”. She suggests paint. I excitedly agree, and start speaking to her about paint colors. She suggested a taupe. Say no more, Melissa! I’m off to Sherwin Williams! I drive quickly to the store, did NOT know we had a Sherwin Williams around the corner from us, always good to know that we have high quality paint close by, with a sample of some scrap wallpaper. I was only in there for a few minutes before I found the perfect shade of beige. (Yes there is such a thing 😉 ) . Mega Greige.

57809046231__88116A1D-5ADC-4DAA-A21D-0BD89448D84D

It’s perfect, am I right?

I get home, tape up the walls,  open up the paint, and get to painting.


One question I get asked a lot is what color my walls are. Well, this Mega greige is just a much darker shade of my oh so popular Accessible Beige that everyone seems to love so much.  Once the paint was applied and completed, I knew I made the right choice and was SO grateful for my friend, Melissa, for helping me out on this final touch.

57809505456__971C7A7B-326C-4FC8-A6F8-2EAB83BE346C

This was after one coat, I wound up needing two coats.


After I had completed the painting portion of this project, my husband and I were officially DONE. The only thing left to do is decorate (as said previously, everything has already been purchased – so now all I have to do is put it all together).

IMG_4619.jpg

Stay tuned next week, Week 6, for the FINAL REVEAL! I will be showcasing the entire room plus listing all the links for all available items.

ORC- Week 4 – Over The Hump

I cannot believe that we are staring at the finish line with the One Room Challenge. What a smooth, and easy process this has been! It makes me want to refresh all of my bland and boring spaces in our home. (Although, I’m sure my husband would give me full blown death looks if he saw, or read, that statement.) Last week, was the completion of our ‘midway point’. Now, that we have entered our fourth week of this incredible transformation, all that is left are the final, finishing touches.

The first thing we completed at the beginning of week four was installing our new chandelier. As soon as that bad boy went in I knew that this vision I had was going to work. At first, I will admit, I was concerned about choosing the right size light fixture. We have fairly low ceilings (9 foot) so it is imperative to choose lighting that isn’t too large. Typically, I would have stuck with flush mounts for these smaller, confined spaces, but I really wanted to make this hallway into a show (and scroll) stopper. I had an idea in my head of what kind of fixture I wanted, I didn’t want to spend a fortune on it though. So when I found this $83 chandelier, you bet your bottom dollar I was ecstatic. Once we received it from the oh so incredible Amazon, my husband instantly installed it, without me even having to ask. That alone was pretty great, but once up I then realized this hallway was going in all the right directions.

57669511500__31FEC0FF-1DD5-4519-AF2F-C39873820055

After our board and batten was installed, I took this week to paint prior to us installing our wallpaper. To save money, I requested to paint myself, because ya know, painting really isn’t too difficult, especially when you do not have to worry about “staying in the lines”. I painted the board and batten the same color as our trim and baseboards; this way it would all look as if it were one consistent color and let’s be real, we have so much leftover paint from when our home was finished being built – why waste the money? Our paint color is West highland White by Sherwin Williams in satin finish. I made it extremely easy on our builders, and myself actually, when I chose our paint colors. We stuck with all Sherwin Williams colors. Our walls throughout our home are Accessible Beige, our baseboards, trim and crown molding are West highland White in satin finish. (I get these questions a lot) I also chose to do our exterior paint in West Highland White as well.  I avoided so much confusion when needing to touch up those nicks and scuffs from those oh so gentle toddlers in our home. ( Painting tip: if you find a color you love, stick with it throughout. You’ll have a much more difficult time choosing multiple colors you love equally as much. When the time comes when you want to change the color of a room, you at least will never regret your initial color choice and more importantly, you can take the appropriate amount of time to decide on that secondary color.)

Anyway, as I got a little sidetracked with paint talk, I happen to be the single sloppiest painter in the all of the North Atlanta region. Mark. My. Words. So when my husband suggested I paint prior to installing wallpaper, I was all like ” you, my friend, are a freaking genius”. Because, I clearly am incapable of thinking two steps ahead in projects such as this. After I finally dug up the paint, which was buried deep in the back of our shelving system in the garage, I got to work and started on my first coat.

IMG_3981.jpg
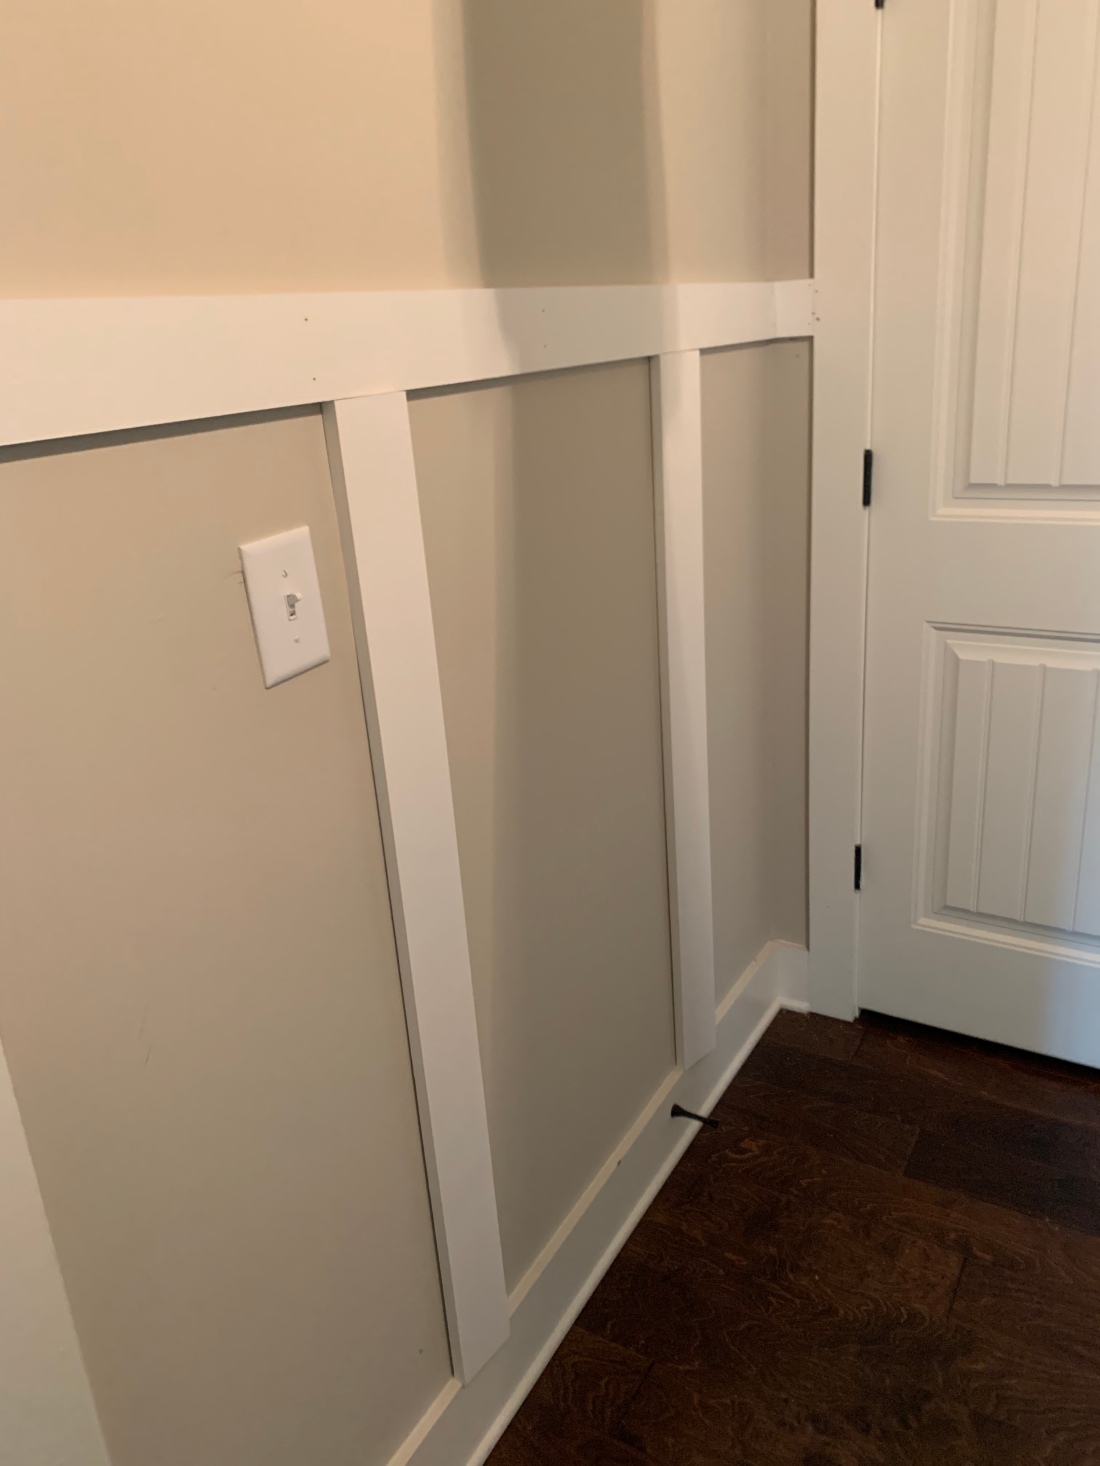
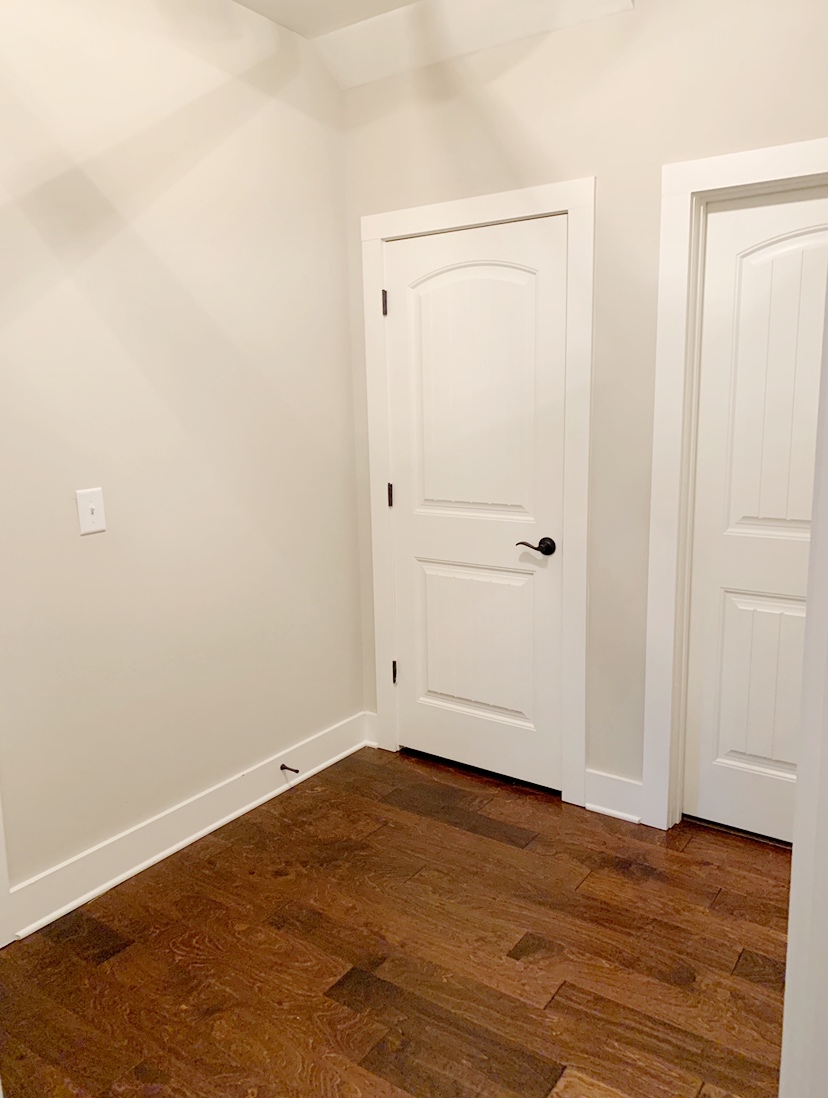
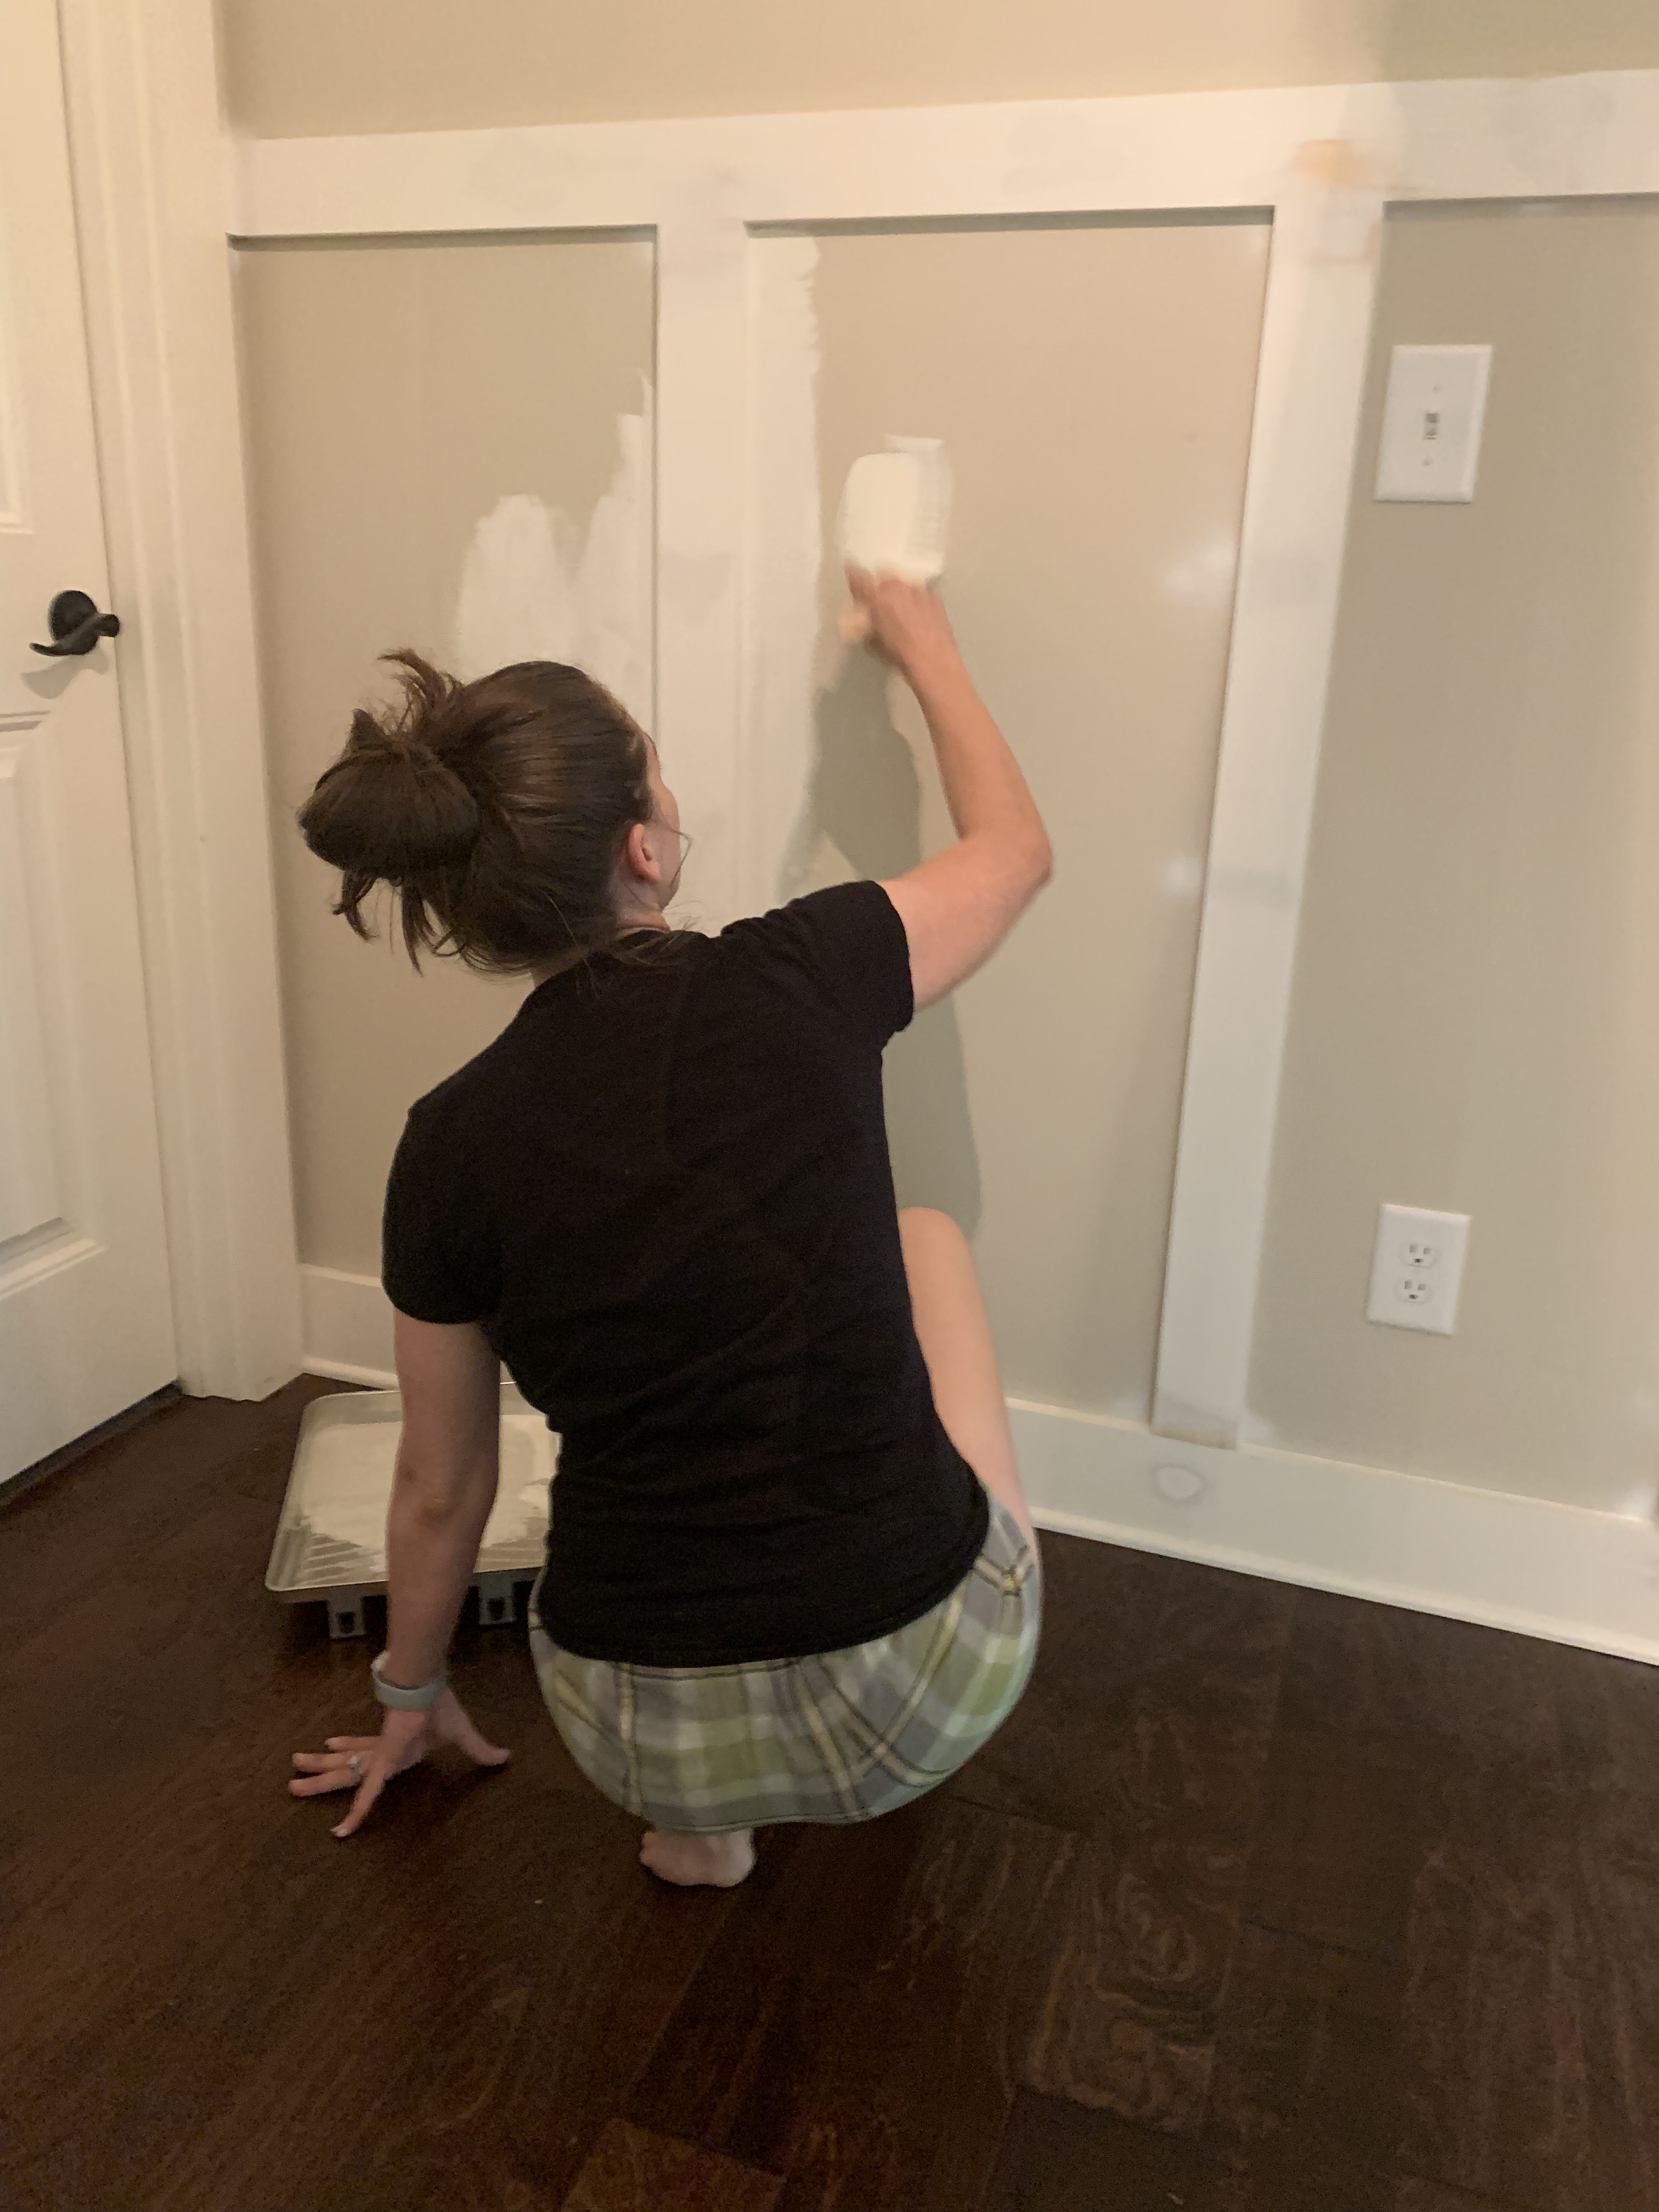
(I have to throw out a quick reminder here that we only have a few hours at a time to work on these projects. My daughter’s bedroom is on the left of this space and we are really only able to get tasks done while she naps. )

So, as I am painting, as quietly and quickly as I possibly can, I am realizing that I am going to need multiple coats. So annoying. One coat is doable. Two is tolerable. Three is just annoying. But at this point, I am committed and I have to finish the job. Even though I am irritated at how long this mundane task is actually going to take, I quickly start seeing the results and I am more than pleased. My vision was coming together so beautifully.

57696508292__3369BE1A-842A-4120-AE05-D4E06EBFAFC4You can start to see how the two toned walls really beginning to have an impact on this tiny space.

Once I finished all three coats, honestly I could’ve gone with four coats but my ADD kicked in about halfway through the second, I couldn’t have been more ready to clean this brush and pan and show my husband. As I was picking up all of my painting supplies, he walks in. He looks around, looks at me , and says “WOW. This looks incredible”. He is my toughest critic, and never sugar coats anything for me. I knew right then and there that this project was only going to get better from here.

IMG_3991


Amazon Link to purchase light fixture:

https://www.amazon.com/gp/product/B0759SGLXZ/ref=ppx_yo_dt_b_asin_title_o03_s00?ie=UTF8&psc=1

Master Bathroom Lighting Refresh

When we were building, my absolute favorite part was designing the interior of our home. When I say favorite part, I would do it all over again for the chance to design and decorate a home from the ground up. It was the single most amazing and exhilarating experience of my adult life. (The process actual got me thinking about my future and what I want to do with the rest of my life, designing – but that is a topic for another time) When it came to the point where I had to meet with our builder’s interior designer, I walked in with every single detail completely mapped out. The entire process took about an hour; from choosing wall colors, brick, counters the whole nine. I had ideas about lighting, but that was an entirely different appointment through a little mom and pop company set up for another date. Quickly, our lighting appointment was approaching so I scheduled for my mother to watch my children while I drove the hour south to start picking out chandeliers, flush mounts and exterior lighting.

I had an idea of what I wanted to style my bathroom like; and that design was completely different from the remainder of our home. I wanted a modern farmhouse bathroom. Your standard white and black bathroom with my mosaic flooring. Well, what Melanie wants, Melanie gets … long as it is within budget of course, and as long as she has a babysitter so she can carefully choose accordingly. We get through every room of the house with our lighting sales girl. We chose our flush mounts, chandeliers, kitchen pendants and then we get to the master bathroom… and my phone rings. It’s my mother demanding I get home. Sigh. I quickly chose the first black and white vanity lights I come across so I can haul butt on out to grab my daughter. Needless to say, I was annoyed, but it was what it was. Our original lights were not bad, I actually liked them, but they were not what I was envisioning. I wanted gooseneck vanity lights to match the shower heads I had chosen. I figured this was something I could upgrade to later on in the future. No biggie.

IMG_3779
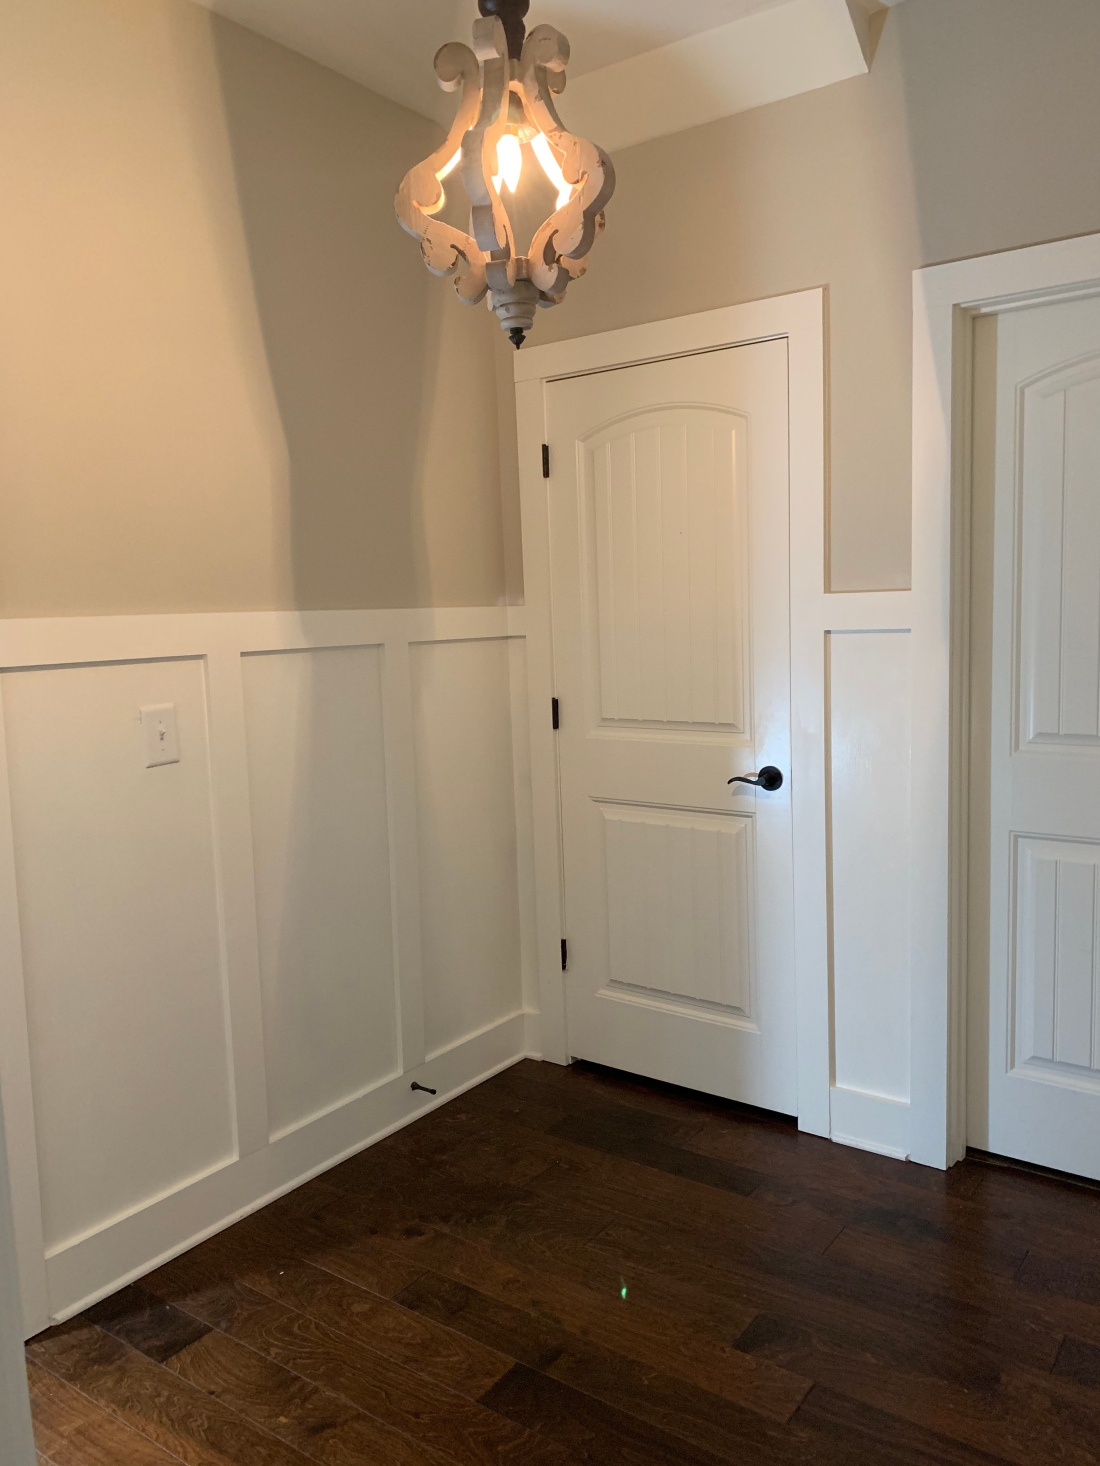
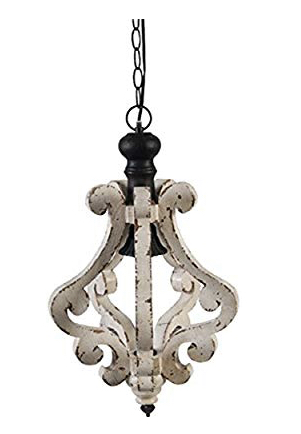
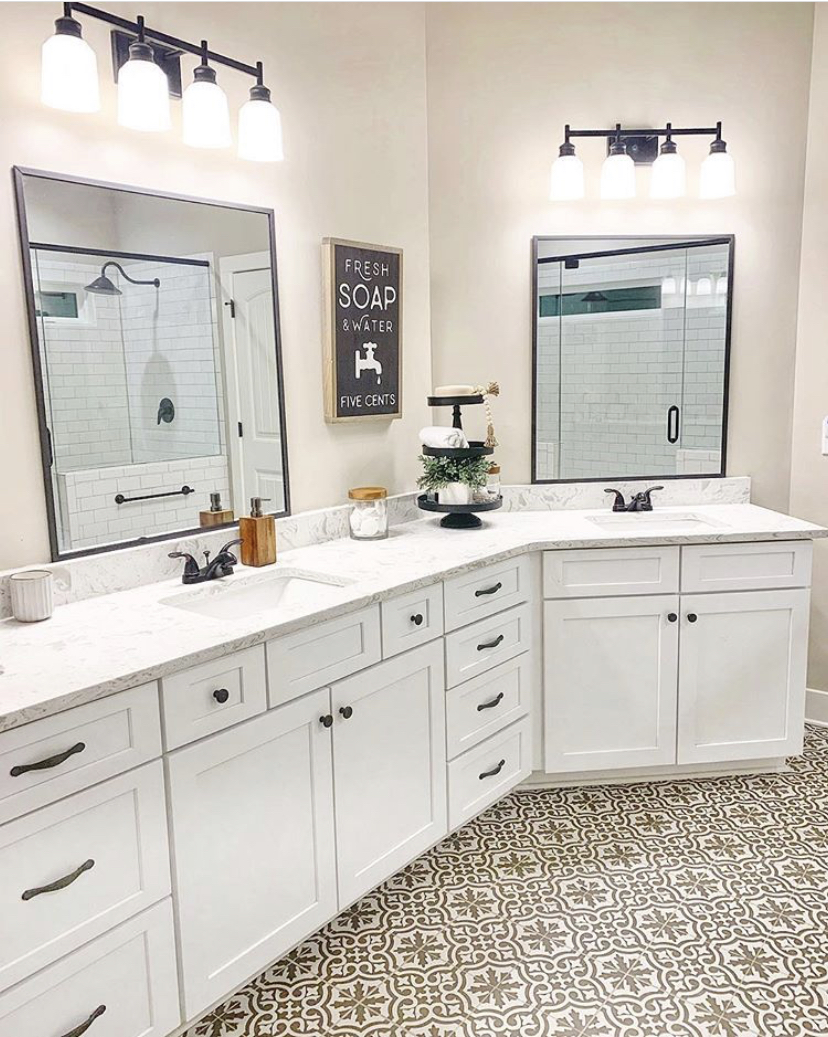
(This lighting worked with our bathroom but definitely not what I was envisioning in the least bit!)

So, a little bummed, I just put on my big girl panties, thanked my husband and counted my blessings that I was even able to have the experience of building and designing a home! When we moved from Florida, we came from renting a tiny 1500 square foot townhouse, so just the thought of being able to build was a whirlwind in itself. Well, I managed to get this gorgeous chandelier for our dining room. It was oil rubbed bronze, with the most perfect off white/greige beading; it was probably the only light fixture I was truly excited about. So what happens to all things that you love? Your children and animals ruin them, of course. It’s inevitable. One evening, I’d say about six months ago or so, I hear a large crash from our bedroom coming from the dining room.  My husband and I rush out the room and see our cat, Semi, on the dining room table, surrounded by plates, playing with a broken strand of beads. I was fixing to murder him. MURDER. The next morning, after we tried fixing the beads – with no success, I sent our builders an email asking we should do about my favorite chandelier that was now ruined. She gave us Progress Lighting’s customer service telephone number. I did not think they would help us to be honest. I thought we were, for a lack of better choice of words, screwed. Well, they didn’t just send a replacement part, it was warrantied and the beads came with a service technician direct to our door! I was a bit taken aback by this type of customer service to be honest.

IMG_4286.jpg

This is an important part of this whole refresh, because I would have probably wound up purchasing new lights from Amazon. Instead, I went directly back to Progress Lighting for my new vanity lights for this refresh. Customer service goes a LONG way, people!

I reached out to this fabulous company a couple of weeks ago, and after searching for the perfect lighting and debating whether I should go traditional modern or modern farmhouse. I stumbled upon the amazing gooseneck lights I have been seeing all over the infamous bathroom pins on the wonderful, and very time consuming, Pinterest. These lights matched my gooseneck shower heads PERFECTLY. I had quickly fallen in love with lighting, once again. (Let’s see our cats try to break these bad boys)  I placed my order and my lights were delivered to my front door within a couple days. Yes TWO days. Mind blown. Another plus for this company in book.

57732435055__D2547E91-A6BB-4126-AFBE-7B898CFDD3AE
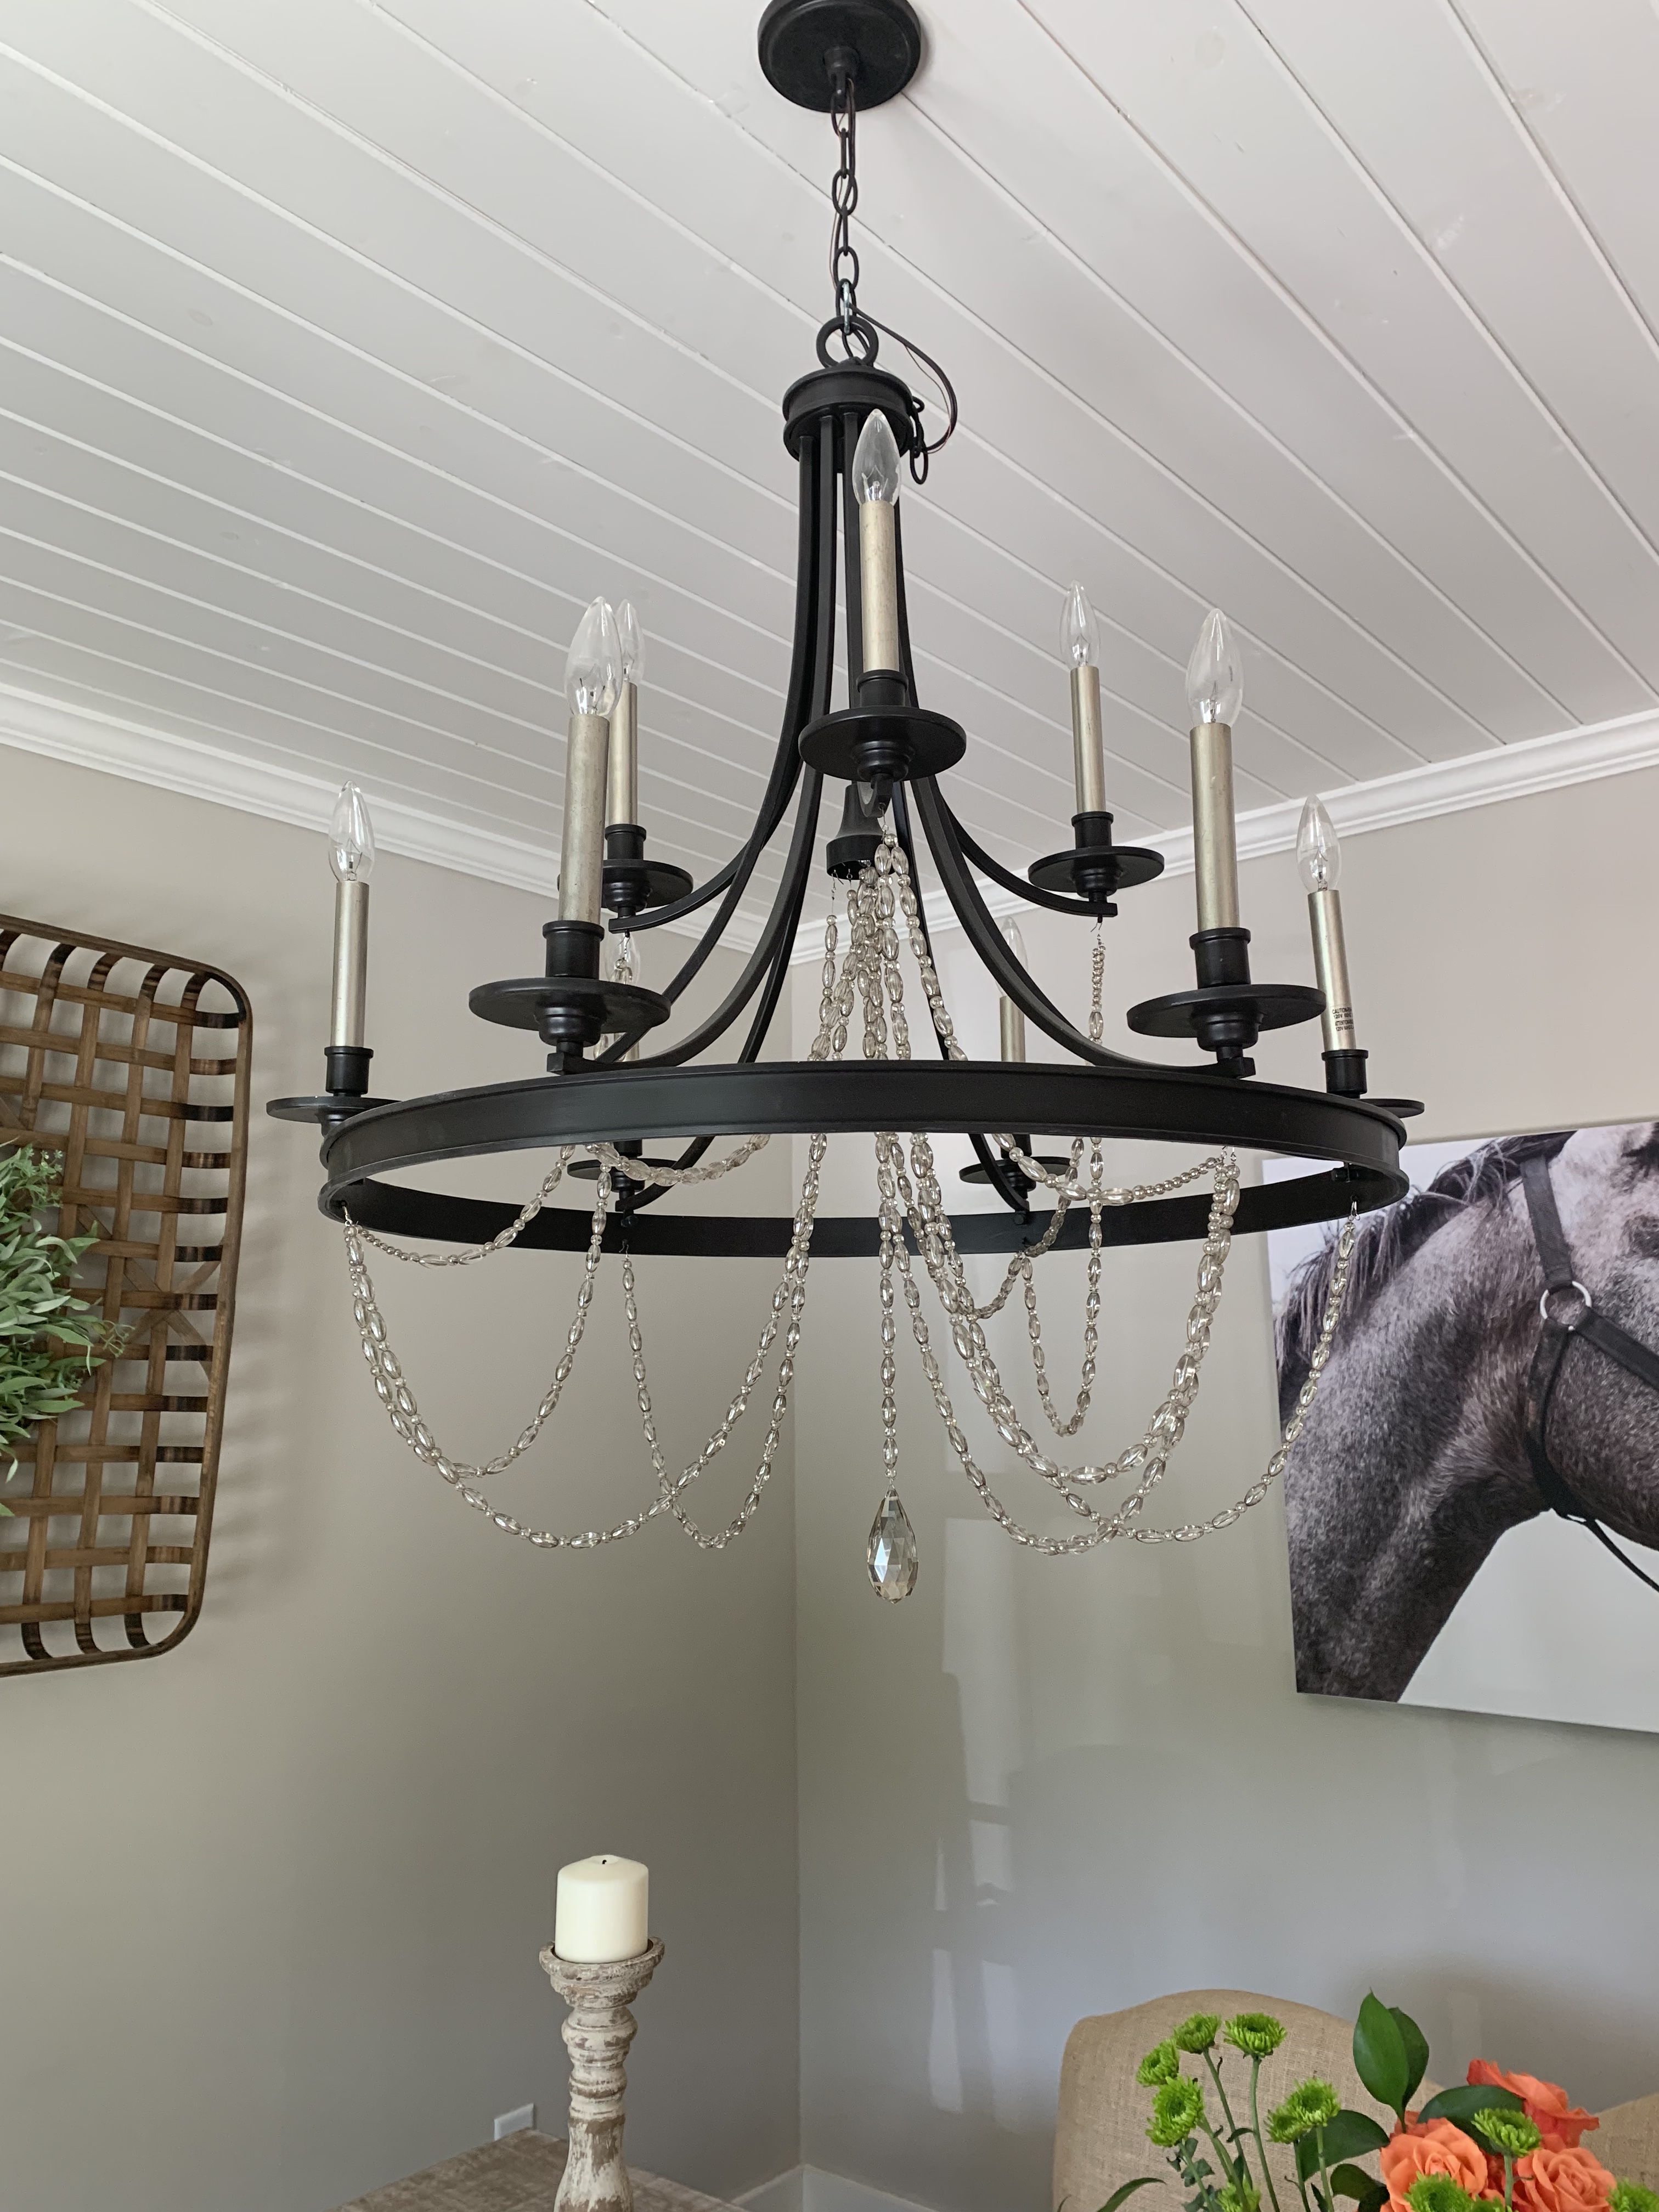
Look at how perfectly these mesh (channeling my inner Cher – where my Clueless fans?)

So, after receiving the lights, it took about a day to convince my husband to hang them for me. (Since I am useless with any type of handy man task). He agreed to hang them the next evening. Typically, when I ask him to do any sort of work around the house, his work never comes without a lot of cursing, yelling and banging. Never ever ever. I stroll into the bathroom, quite frankly kind of scared, to see what I was about to walk into. I honestly thought he didn’t start the project because it was so quiet. Nope, he was laying on the bed reading the news. I look at him and quickly glance into the bathroom. Lights were installed. He looked up and said “Yep, took less than 10 minutes”. I am not sure if installing vanity lights typically takes longer than 10 minutes, but he was happy about it, so I was happy.

All in all, Progress Lighting is such an incredible lighting source. They come HIGHLY recommended from me. Their customer service is phenomenal. Their selections are phenomenal. Their processing is phenomenal. I will definitely be purchasing more lighting from them when the time comes to upgrade more fixtures throughout the house.

IMG_4285
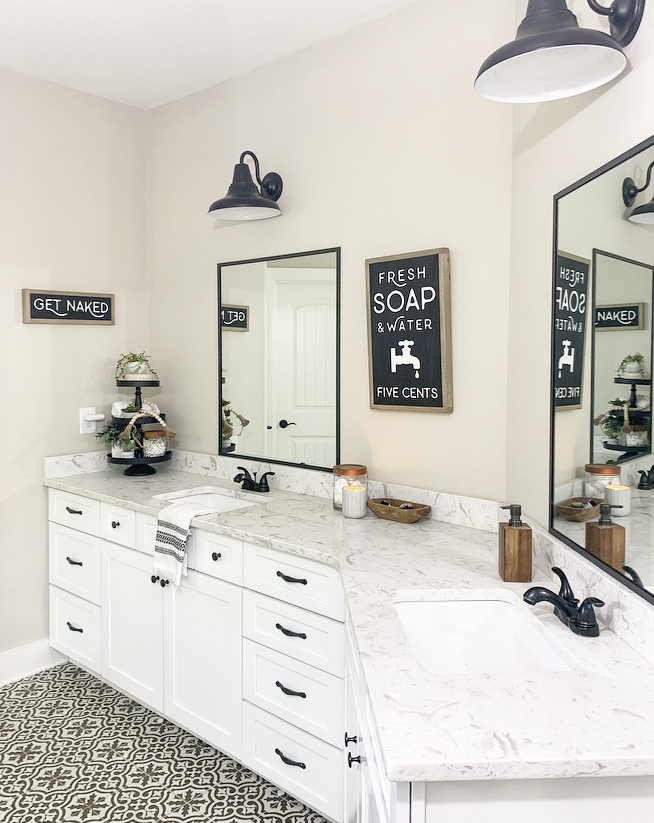
Check out the amazing after of our Master Bathroom Lighting Refresh. All the heart eyes on this one.


Progress Lighting:

http://www.progresslighting.com

ORC – Week 3

I feel as if this One Room Challenge is just flying by so incredibly quickly, and more importantly, smoothly. This week I decided to get out of the house for a bit and start shopping for all of the little accents pieces I plan on using to decorate our newly refined space. But, before I head into those details, I wanted to discuss what was completed this week. I’ll be talking about the accents I purchased in the next following weeks. As for the completion of week 2, so many good things happened and I am so excited to share them with you all.

First item of business, this incredible miniature pantry. It is officially completed. When I found my cabinet and shelving guy, it was a godsend. He was efficient, inexpensive and most importantly quick. (It is virtually impossible to find all three things in one contractor….I know this from multiple GC’s that have entered, and exited my life in the passed 4+ years. So my contractor, Jason, had this mini-pantry completed within a week. Seems a bit long but let me explain. One week from the time of our first consultation, to him ordering and receiving the drawer fronts, to installation. Not bad at all. Mind you, everything fits like a glove. If I was installing and measuring, you bet your butt it would take me a minimum of three weeks to get the measurements correct. (In case you were not aware, there a things I am incapable of doing – 1. measuring- it’s humorous how I cannot measure to save my life. 2. dates – anything that is scheduled on specific dates I manage to royally mess up – case and point – my husband and my honeymoon. We may or may not have checked out of our honeymoon cabin in North Carolina two days early – whoops. So the fact that I am able to keep up with the ORC, and have my timeline in order is a flipping miracle). Anyway, as I get completely sidetracked with my flaws as a human being, I ran out to Hobby Lobby, grabbed my hardware for the drawer fronts – because Hobby Lobby has the best, and most original, hardware available for purchase in any brick and mortar – prove me wrong, and tada! Completed!

IMG_3951
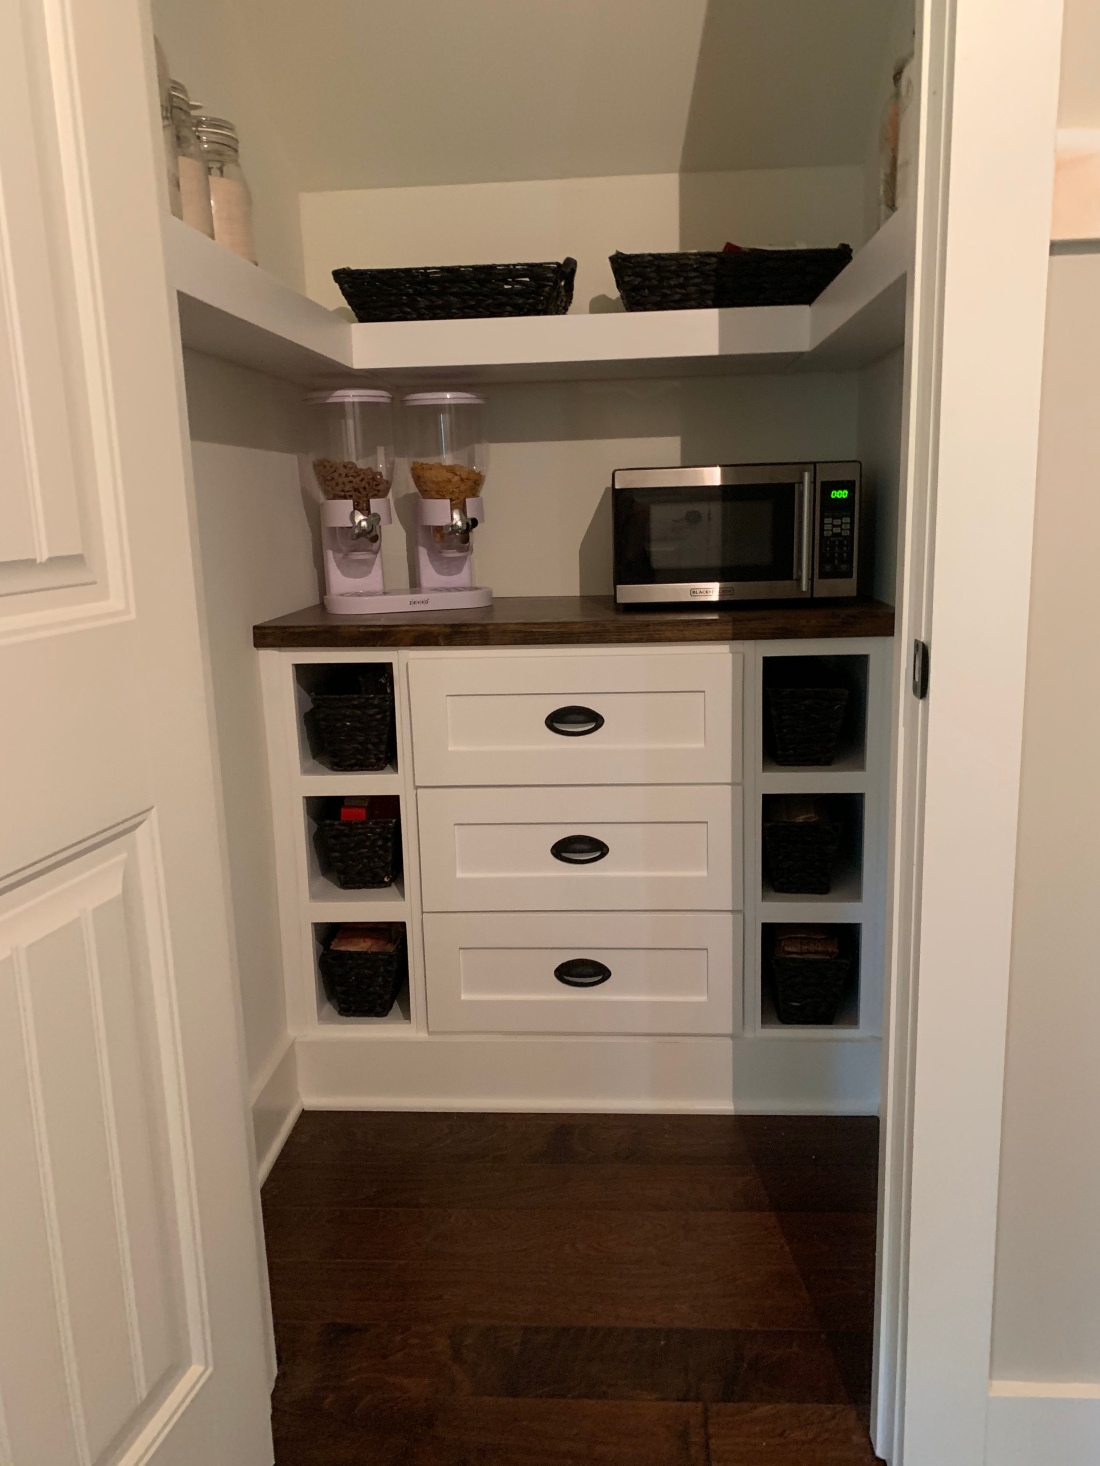
Just look at how perfect the hardware flows with the baskets I found at Big Lots last week.

So, since Jason was so timely with the pantry, after he completed this project, I said “ya know what? We all know my measuring inabilities, will you do my board and batten for me too?” And wouldn’t ya know .. completed by the next business day. Seriously, if anyone needs a reliable contractor in the North Atlanta region – DO NOT hesitate to contact me, he is too good to keep all to ourselves.

So, Jason installed the board and batten but I had said I would paint. Ugh, another thing I am just not good at. Painting walls. I think I am hands down the messiest, sloppiest painter in all the land. (But I have to tell you, a nice thing about having these particular engineered hardwoods is that the paint wipes right off). This hallway took him about two hours to complete, and throughout the entire process all I could think of was “I do not want to paint. I do not want to paint” No, I didn’t beg him to paint. I’ll be conquering that in week 4.

IMG_3878

If you aren’t familiar with how to install board and batten, there are a couple of ways to do it. I opted to take the easy, and affordable route. Some people choose to literally panel the walls, while adding 1×4 strips of wood on top of the paneling. That just seemed so silly to me, and quite frankly a waste of money. When we shiplapped our bedroom accent wall, I also refused to buy actual shiplap, we used plywood instead; but that is for another blog which will be written sooner than later ;). What I decided to do, as opposed to paneling, was to just have Jason install the 1x4s on top of our walls. Once painted, our hallway will look just as good as a paneled wall.

Aside from the accents I purchased, as mentioned in the beginning of my week’s follow up, and the completion of all the cabinetry and woodwork,  I received our new lighting. I purchased our French country inspired lighting from Amazon, for $83. Yes you read the correctly. $83. Originally, I wanted to have sconces on the wall that separates my children’s bedrooms. I had decided against that however because that specific wall is actually small space , its about 5 feet long and I felt that it would look too crowded and would be total overkill. When I was searching for lighting and came across this incredibly inexpensive, yet beautiful, chandelier I knew the exact direction I was wanting to go on the lighting front. Our home is neutral. Our walls are beige with white trim. I love it. I know grey is the hot thing, and everyone swoons over the greige (grey + beige) shades, but I decided to choose shades that worked for us. I have always been a beige over grey kind of girl. When i saw this lighting fixture, my jaw dropped to the floor. Distressed white with beige undertones. It was clearly made for me and my home.

IMG_4118

Between the shades of whites and beiges; and the black hardware, and baskets as well as the touches of black in this light fixture, everything is just coming together so perfectly. I couldn’t be happier that my vision is truly coming to life with great ease.

Stay tuned for week 4, where I will be showcasing my incredible painting skills and the installation of this light fixture.

One Room Challenge – Week 2

We have officially moved on to week 2 with the One Room Challenge. The design has been finalized and we are in the process of moving forward, quickly I might add. I am absolutely loving how everything is coming together to bring our family organization and functionality.

To recap on this incredible makeover, I have planned on putting the finishing touches on my children’s hallway and am converting our closet that is located under our stairway into a miniature walk-in pantry. When I thought of this idea, my first thought was “uh, GENIUS!’. Well, the pantry is 95% completed. I outsourced a carpenter to do the install, mainly because I am terrified of power tools and my husband works crazy, long hours at his job. In order for me to get this space completed, I would obviously need a little bit of help.  So I am going to talk about the transformation of this closet today.

This closet started out as a hot mess. We stored, or I should say threw, all of our cleaning supplies and materials into this one shelved space. It would give me insane anxiety whenever I opened the door to this area, all I wanted to do was clean the cleaning supplies. Awful. Getting the motivation to clean in general is tough enough, and then once you are motivated all you can think about is cleaning the cleaning crap. I had to put an end to the insanity. So, my plan was to move to cleaning supplies into the smaller closet, with multiple shelves I might add,  in the same hallway.  One thing done on our check list. Mission accomplished.

57653752087__C0827406-B7F5-4788-B249-6A2F52CC81F9

Now to discuss the pantry. I am getting so giddy about this, it’s a little weird. Ha Ha. Since our closet is really not that large, I only had a little bit of space to work with to make it functional and worth while. The plan was, one narrow lower cabinet and one floating shelf. After I came up with the design I was honestly concerned about not having enough space. Would it even be worth the effort? Would it be worth the money? Well.. YES!!! Installation finished up two days ago and WOW. I decided on three drawers which would ultimately hold all of the kids’ snacks. (You know, the individually packed goldfish and chips that you buy at Costco that take up so much flipping space) I originally planned on storing them in baskets, but to be honest, baskets are expensive and they take up a lot of space. So, in the drawers they went. My one, wrap around shelf is now the designated spot for our flour, sugar and baking stuff that is stored in glass containers.

IMG_3869

Yesterday, since I wasn’t bound to the house for this installation, I decided it would be best to hit the road and start looking for items to fit in the little cubby holes. One of my best friends showed me these narrow baskets that she scored at Big Lots. After she took the measurements for me, I booked it to store and snagged six of them. I was beyond excited since these cubby holes are an awkward size and I thought finding baskets that fit was going to be tough. Talk about the single most painless mission ever. But, while I was there, I found larger baskets that matched to go on the back floating shelf. DOUBLE SCORE. I purchased a total of 9 baskets for under $65. It was more than I intended to spend, but I was also looking for particular sized items. Looking back, I’m sure I could’ve found similar items for a cheaper price, but the impulsive shopper that I am, I said “whatevs… MINE!”

I raced home to see how everything would look in their new designated spaces. And heck yes, it works and works well. I stuffed them bad boys quicker than I did running to the register to purchase them.

IMG_3874(1)

I mean, it’s a perfect fit. These baskets are an espresso color. I have to admit, I was a bit skeptical about mixing the wood tones (The counter top is dark walnut – my go to stain by the way…) but I am starting to really love how it is all coming together. If i do decide that the basket colors are not the right shade, I have no problem spraying them down with some Rustoleum – when all else fails, paint. HA!

So, the pantry is almost complete! The drawer fronts are going in tomorrow, or Monday. I purchased our pulls today at Hobby Lobby and the plan is to wallpaper inside the closet to match the walls in the hallway!

Up next: board and batten throughout the hallway, paint, wallpaper, new lighting, then decorate (my favorite part – especially since its the only thing I’m competent enough to do throughout this entire process <insert laughing face emoji>) Next week, I will show everyone the wallpaper I chose, the completed pantry, light fixture and accent table I have purchased. Stay tuned and thank you for visiting and watching the progress!

One Room Challenge

Building a home from the ground up comes with an entire set of challenges. Starting with finding a plot of land, then finding floor plans that work for your family. Once your home is framed, sheet rock is installed, upgrades have been finalized … BOOM you’re out of money! It’s a horrible feeling when you capped financially and you’ve only scratched the surface on the design front.

Well, if you’ve been following along with my build, and design progress, you know that we have been settled for almost a full year. After a year of being on tight budget restraints, we are officially back in the game with the renovation aspects! And what perfect timing than Spring when the biannual One Room Challenge is in full effect!

I saw this challenge promoted on Instagram in the fall and immediately knew that I wanted to participate in the 2019 challenge. We have a fairly large home, but the way our layout is it is extremely tight in most areas of the living quarters. The room I decided to renovate is Dylan and Giuliana’s hallway. Their hallway is extremely awkward. It’s shape resembles something of a pentagon ( I know, what is that? How do you even work with a space like that?!) . So, naturally, I have been putting it off since the day we brought in our furniture from the old house. But when this challenge crept up on me, I sat down, and really brainstormed exactly what I wanted, what I needed, and more importantly, what was possible in such an awkward space.

IMG_3600

My thoughts were this; I don’t have much room to work with but I want something pleasing to the eye. I need something functional. And the only thing that could be possible would really be working in their hallway closet to make all of the above come to life. So below, are my ideas for this tiny, awkward, and what I thought to be, useless space.

Their hallway is is visible from the kitchen and builtin eating area. Something HAD to get done to it since it couldn’t be hidden. First thought, BOARD AND BATTEN! Yes, please! Who doesn’t go crazy over board and batten?! So it was finalized. Board and Batten around the perimeter of the pentagon-shaped hallway. Next up, new light fixture. I initially chose all of the same flush mount lighting for every space in our house for a couple of reasons. For one, I loved the light – obviously. And secondly, I knew I would be happy with the choice until I was ready to upgrade. (this is a huge tip from me when building. Choose something relatively inexpensive that you will be happy with until you are ready to move onto bigger and better things) After lighting was decided, I thought, ” well I need to take this make over a step further” . What better way than wallpaper. I know, wallpaper isn’t for everyone, but I am a firm believer in neutral tones and colors but more importantly choosing things that YOU love. YOU are the one who must live in your home, not the critics of the internet, and world. Sorry mom. 😉 Let me reiterate, just because everyone isn’t a fan of wallpaper, that doesn’t mean you should go crazy – I needed to find something that I wouldn’t get sick of. Well, I found some and I am OBSESSED. I cannot wait to show you all in the weeks to come. So, here I am, hallway planned out, and it dawned on me … this is B O R I N G. I need a little something extra to really kick the space off.


Well, under our stairs, in the hallway, we have a standard storage closet. It was as if a  light bulb  turned on as soon as the word EXTRA passed through this little brain of mine. I decided on converting this once cleaning supply closet into a miniature walk in pantry. DING DING DING! That was it! Plans were finalized, I was ready to get this party started!

IMG_3601

I wound up ordering my amazing French Country light fixture and wallpaper from Amazon and will start the installation process this weekend. Excited is an understatement. I am so happy to be apart of this incredible challenge, meeting new friends, and being included in something so large and wonderful has given me life. I hope you all enjoy this 6 week transformation! Stay tuned for the update NEXT Thursday!

Patio Lane

Decorating a new build comes with many, many challenges. First, picking, and sticking, with a style. You have intentions of one trend but once you see the items in your home, your vision isn’t quite coming together as planned; and if you’re anything like me, your decor changes seasonally (I guess that is one of the perks, or hassles depending on how you look at it, with being an Instagram influencer). So, after months of trial and error, you find your niche. Second, being able to afford said style. Furniture and home accents are EXPENSIVE. I mean, really really expensive. You could be frugal on some items, yes, but even the Target Dollar Spot starts to add up, quickly. Not to mention, when you have children they ruin everything. AND I MEAN EVERYTHING. Tables are sticky, couches are covered in the wonderful orange Georgia clay, and let’s not even mention the floors I have to clean twice a day. But, needless to say, owning your home has an enormous sense of gratification.

As you know, we moved to Canton almost a year ago (WOW! I feel like I just started writing and posting about our new build yesterday!) from our first home in Roswell. Our home in Roswell was never intended to be our forever home and with those intentions, decorating and making it our own was always put on the back burner. I did not want to invest in a home that we would eventually leave. Well, since settling into our farmhouse and really grasping what we wanted, and didn’t want in our forever home, I knew exactly what was considered a maybe on the decor front and what was a nonnegotiable .

One, of the many nonnegotiables, was our kitchen. Open shelving, butcher block island and white quartz fully equipped with bright lighting and an eat in kitchen area with built in bench seating. We are finally at the point where tackling the small details of our home is within our budget. One thing I did not really think about when building our built-ins though, was comfort.  Yes, I styled with some throw pillows for photo purposes but our seating was definitely missing that little something extra. When I found this Florida based cushion company, Patio Lane, I knew exactly what was missing. Custom cushions for my bench seating.

When I contacted them to see if they were able to customize a set for me, and more importantly that they would be able to work with me from such a far distance, and they said yes I was thrilled!! I sent them my dimensions via email, since speaking on the phone gives me a certain level of anxiety (I blame the millenial in me), they responded within hours which was shock number 1. I am so used to companies really utilizing that standard “reply within 24 hour” rule and it drives me CRAZY. It’s one of my biggest pet peeves to be honest, and it was not experienced through working with Patio Lane. Already, I am happy. Clearly, it doesn’t take much to keep me content HA! So, truth be told, we were exchanging emails for awhile between checking the correct dimensions and discussing my style.

Then, the hard part comes. Choosing a color for the cushion covers. I was sure that I wanted to stick with a shade of grey. If you know me personally , or  just follow along with my daily Instagram posts, you know I am a neutral kind of gal. Give me all the whites and beiges and I am happy. So when I decided to go grey, it was out of my element. But, reverting back to the beginning of this blog post, KIDS. HA HA HA I would be a fool if I chose white cushion covers with these dirty, messy offspring of mine. I was set on grey. After the dozen emails going back and forth, they mentioned “well, let us send you samples.” They had me at samples. I was thinking – I am forever in debt to Patio Lane; I am hundreds upon hundreds of miles away from their warehouse, and they are treating me as if I matter! (This seems pretty standard, I know, but you would be surprised with the lack of customer service I receive daily – it’s actually quite astounding how some businesses stay afloat just based on their impersonal attitudes).

So let’s fast forward to a week after I agreed to view samples. I figured they would have sent me MAYBE three shades to choose from. NOPE. They sent me EVERY SINGLE shade of grey they offered. At this point, there was really nothing they could do to mess up with business relationship at this point. I chose my fabric, sent my dimensions along with a few photos to show them the space. Low and behold, there was concern about the trim on the built-ins. Not surprising to me in the least bit since I am incompetent with such mundane tasks like measuring. They immediately responded to my email stating that they were concerned about the trim and wanted to make sure these cushions fit this space perfectly. Mind Blown. Most companies would never go this length to provide this level of satisfaction with their customers. So, after remeasuring and confirming the final details of measurements, color selection and depth of the cushions, I placed my order and patiently awaited for this delivery.

Once the cushions were received a few weeks later (remember, custom sizing means special order which means playing the waiting game), I noticed how well they were packaged. With the utter most care. I carefully opened them since I didn’t want to damage them obviously, placed them on my benches and sat down on them to check out the comfort level. SO GOOD. I wound up choosing Cast Slate. I COULD NOT BE HAPPIER. Aside from the incredible quality of the fabric and cushion material, the best part is they are machine washable. Remember dirty children = always needing accents that are machine washable.

IMG_2839

IMG_2842

I was blown away by everything that I experienced through Patio Lane. I will be using them again in the future for our upstairs window seating, hopefully in the near future. If you are looking for custom cushioning and are at a loss as to where to start shopping, look no further. I did the back work, I tested the product and dealt with the customer service. THEY ARE AMAZING and most importantly , you will be satisfied.

IMG_2841

This Amazing Little Accessory from JORD

Boyfriend jeans, white t-shirt, Birkenstocks. Hair in a messy bun, a little foundation on the face and mascara on the lashes if I’m feeling frisky. The life of a low maintenance girl. I have to tell you, I wouldn’t have it any other way. Don’t get me wrong, there are times where I clean up rather nicely. I wear my pricey heels and slim fitting dresses; but those days are few and far between as a home maker and mother of two.

A few months back I was scrolling through Facebook, like all us addicts do first thing in the morning and around lunchtime, and lets be real, throughout the majority of our 12 hour day. Well, I stumbled upon this ad. It was for these really incredible and original men’s watches that were made out of wood. (If you don’t already know, I have a fixation about wood. My kitchen is completely accented in it, as is my exterior; I even developed a hobby circulating around creating art on wood) I immediately tagged one of my best friends and commented that these would be the absolute perfect gifts for our husbands for Father’s Day. But as luck would have it, life happened and neither of us were got around to purchasing these gifts for the man in our life. Sigh.

Fast forward to approximately one month ago. I’ve recently taken a hiatus on Facebook and have been dedicating the majority of my social media time on Instagram. As I was doing my morning scroll through session; admiring other home decor accounts and fashion bloggers (yes, I follow fashion bloggers – i envy a woman who can whip up a trendy outfit and accessorize like its nobody’s business – shocking, I know) I saw one of my friends post a shot of her beautifully accessorized wrist. Low and behold she was wearing that timeless wooden watch I saw months ago on Facebook. I immediately clicked on her link in her bio which led me to the JORD website. As I was drooling through their website I realized that they had an entire collection of women’s watches. I said to myself, “you deserve this.” I took the plunge and got something for myself for the first time in a very, very long time – and not once have I looked back with an ounce of regret.

IMG-9023

I received my order from JORD fairly quickly. (The packaging alone is worth its own blog. The watch comes in this incredible wooden box with a mini touch up kit – it’s the little things , ammirite?) When I opened that box, my jaw hit the floor. The watch I selected was sandalwood  (which matches my that kitchen of mine) with a smoke face. The wood grain is so unbelievably gorgeous and it screams originality. As such a low maintenance girl, the fact that this isn’t one of those flashy, look at me kind of watches is what originally made me take the plunge. But as the days progress and this gorgeous piece of wood remains on my wrist, more and more people around my town stop me to tell me how much they love it too. The cashiers at the grocery store, the associates at Hobby Lobby and Homegoods, my husband (sorry babe), MY MOTHER ( this one is the most shocking – she has the complete opposite taste in me, to say the least), and yes, even those high maintenance woman. I feel like a trend setter! And I have to say, it feels good!

IMG-8962

http://www.jordwatches.com/series/frankie/dark-sandalwood-and smoke/#mygeorgianfarmhouse

Lucky for you, you can enter this contest for your chance to receive $100 off any JORD watch purchase! Furthermore, all who enter will receive a 10% off coupon as well. Treat yourself to something original, classic and timeless.

You can enter here:  http://www.jordwatches.com/#mygeorgianfarmhouse

<!-- JORD WOOD WATCHES ARTICLE WIDGET START -->
<a id="woodwatches_com_widget_article"  ishidden="1"  title="Luxury Wooden Watch">Luxury Wooden Watch</a>
<script src="//www.jordwatches.com/widget-article/mygeorgianfarmhouse"  type="text/javascript"></script>
<!-- JORD WOOD WATCHES ARTICLE WIDGET END -->

Maintaining Your Home

Here is a brief breakdown of what my average weekdays look like.

I am a stay at home mom to an almost 6 and 2 year old. My son, Dylan, is in kindergarten, so he is out of the house the majority of the day. My daughter, Giuliana,  just started preschool; half days on Tuesdays and Thursdays. Once Giuliana gets home, she takes a nap and then its go time. I mean, she is everywhere and in every thing. Being the super independent little mama that she is, everything must be done according to her. This includes feeding herself. (A NIGHTMARE for someone who is in charge of the household maintenance. A typical early afternoon consists of cleaning up crushed goldfish crackers and sticky-spilled juice. ) Then, 3 o’clock rolls around. We leave to grab Dylan from school, get home by 4 and then its prepping for dinner until my husband, Vince, gets home from work. ( Since our move we are on an extracurricular hiatus for Dylan but pre-move he was doing karate five days a week after school.) In between our daily schedules, I have a fair amount of downtime. I use that time to catch up on social media, go on the internet, and if I’m lucky, and my minime is in decent form, we head to Target. (thank God she is rarely in good shape to go shopping since we would be broke from that heaven sent corporation.)

Even with our busy lives , I do manage to keep a very clean and tidy home. Laundry is always done and never over piling. Dishwasher is always emptied and toys are put away. And no, it does not consume my downtime, ever.

I’m going to share with you my little tricks to keeping a clean and spotless home that doesn’t take away from your family and your personal time. These tricks are a way to retrain your brain to help you see clutter and mess around your house while allowing you to maintain the life you want to live. So here goes!

  1. THE TYPICAL CLEAN AS YOU GO

Yep, I said it, clean as you go. It’s really not as simple as people seem to think it is, though. But here’s the thing, it really is the key to keeping a clean home and once you get into the habit it becomes second nature.

  • Dishes in the sink is a  no no.
    • Dishes mysteriously multiply if left unattended . I know, its insane. And they say magic doesn’t exist!! Don’t let them procreate. never, ever, ever leave dishes in the sink. They either go into the dishwasher if it is dirty or it is hand washed immediately. I know, I know… its really easy to say just hand wash your dishes, especially when you have a wonderful two year old crawling up your leg and a six year old pretending he is fighting in the Vietnam War while blowing up the “bad guys” who conveniently are residing inside the refrigerator door. (insert sarcasm here) But trust me when I tell you, if you take the extra 15 seconds… yes 15 seconds, to pick up your scrub brush and clean that pan and spatula you will thank yourself later.
  • Spot Cleaning
    • I am wiping and spot cleaning all day. That probably sounds exhausting. Just typing it sounds exhausting. But it isn’t and I’ll tell you why. It takes seconds to clean up a spill, or crumbs that are left on the counter. What doesn’t take seconds is cleaning up two days worth of crumbs and spills. What could have been a quick clean up after breakfast and dinner has now turned into an hours worth of cleaning the floors and counters. I do not wish to spend an hour of my time doing a pretty long and tedious cleaning task.
    • Along with wiping up those spills as they occur, I always keep a broom and dustpan at arms reach. Always. I have dark wood floors and let me tell you it is a love / hate relationship. They are beautiful, they really are, but you see every single little crumb and dust bunny imaginable. As I see crumbs, I quickly sweep them up. And guess what? My floors stay clean for an extremely long time.
      • Along with the broom and dustpan, Bona. It goes hand in hand with my sweeping. If you spray clean the mess immediately it doesn’t accumulate
    • I’m a multitasker. When I’m on the phone, I’m sweeping, straightening up or putting away laundry. When my children are eating, I’m cleaning up the kitchen from when I made them a meal. Be like me. Multitask. If a clean home isn’t incentive, think of the steps you can rack in. SO ultimately, multitasking can lead to burning calories.
  • Laundry
    • This is a tough one. Laundry is hard. You forget to put the clothes in dryer, it accumulates, you have to fold and put away. You have to separate the colors from whites. I really despise laundry. But, it must be done. My trick to getting it done and not piling up? Mandatory one load a day. Period. It sucks, it sucks so bad. I know. This is how I manage it though :
      • throw your dirty clothes directly into the washing machine long as it is matching with the clothes inside the machine.
      • If they do not match, keep a separate basket outside the washing machine (or on top of the machine if you do not have the space), not in your bedroom… that’s how this mess gets out of control.
      • run your load in the morning before you leave the house to drop off your kids, do your morning errand, work out .. whatever it is that you do in the mornings. When you get back your load will be complete, and you can throw it in the dryer.
      • folding – sigh.
        • fold your laundry in piles. Keep your shirts in one pile, underwear in another pile, pants in another etc. etc. This way, when you go to put your clothes away they’re already separated. It’ll cut your time in half. (It is also extremely helpful when your kids are old enough to put their clothes away themselves.)
  • Cleaning with kids – it’s the absolute worst.
    • They’ll make messes, you’ll clean up after them, and then they will make more of a mess. It’s fine. Let them be kids. When they’re old enough to help clean they should be taught to put their toys away after they’re done playing with them, but lets be real… it isn’t going to happen 100% of the time. So how I deal, cleanup time mainly happens before bedtime. Luckily, our kids have their own playroom so it is easy to conceal. But when Giuliana and I are playing, I sneakily put her toys away when she isn’t looking. So far, it’s totally working and she isn’t noticing. 😉

2. RETRAIN YOUR BRAIN

It really isn’t as simple as it seems when you are told to clean as you go. You literally need to retrain your entire thought process. You need to retrain the way you see your home. It is extremely easy to walk past clutter and dirt; toys and crumbs. It’s also so much easier to leave your dishes in the sink and skip a day doing laundry. But in the end you’re only hurting yourself. The laziness catches up with a quickness. Getting in the habit of NOT overlooking mess is the key to a clean home. Train yourself to take the extra 15 seconds to hand wash a dish. It is so refreshing to not have to schedule a day to clean. A clean home in a happy home.


3. THE RIGHT TOOLS

Here are some of my favorite must have cleaning products/ items that make my life easier:

Clorox wipes – aside from the spills in the kitchen, I use these bad boys for the bathroom countertops, sinks and yes, toilets. (Especially if you have those bad aimers living with you too)

IMG-7034

A broom and self standing dustpan (I purchased mine from Target but any would suffice)

IMG-7035


Bona – wood floor cleaner and mop (if you do not have wood flooring a swiffer wet jet works just as well)

IMG-7036

Eureka -Mighty Mite vacuum cleaner. – This little $80 sucker is amazing. I use it for the floors, baseboards, car, stairs… everywhere. If you are on the fence about a new vacuum, this is the one.

IMG-7037

Vikan dish brush – guys… this is the brush of all brushes. Aside from it replacing those nasty ass sponges in your kitchen sink, it is durable AF. When it gets dirty, throw it in the top rack of your dishwasher and voila! It’s like brand new. ( not to mention it cleans as well as a Brillo pad)

IMG-7033

i-Robot, Roomba – This is more on the expensive side, but let me tell you. You put this little sucker (pun intended) on a set schedule and your vacuuming is done! I typically set mine for when I’m enroute to Dylan’s school. By the time I get home, house is vacuumed. Amazing.

IMG-7038


I hope these little tips help you to maintain your home a little bit easier!

Be sure to check back for more updates on our farmhouse! DIYs will be up next!


Love,

M